The prompt for days 9-10 of the cloud challenge was the following:
Create an S3 bucket - make sure to use the free tier options. Once the bucket is created, try adding a few pictures, once added delete all but one picture.
Let’s get started!
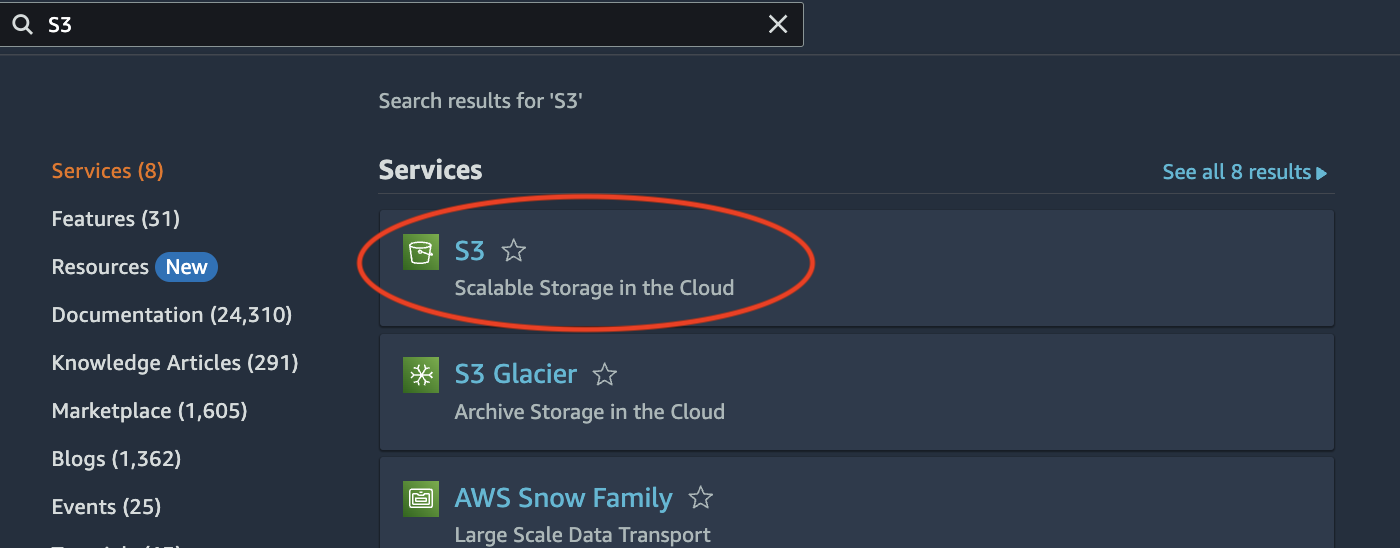
From the console, I typed S3 in the search bar and selected the first option as shown below.
I was taken to the Amazon S3 page where I clicked on “Create bucket”.
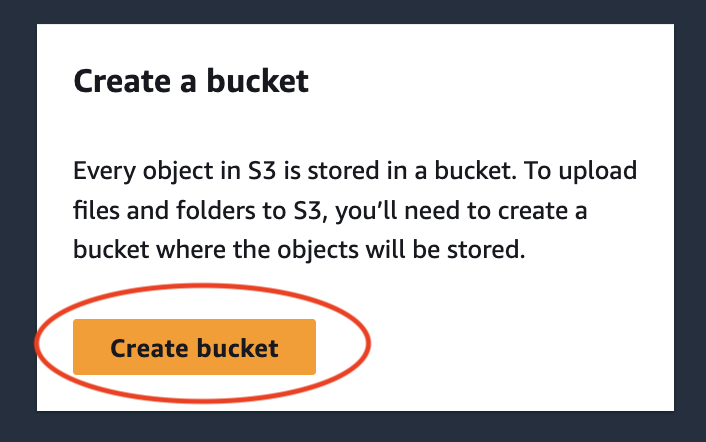
Following this demo from AWS, I selected the region us-east-1 and named my bucket. A bucket name must be globally unique or the name will be rejected. It’s also best practice to choose a region that is closest to where users who are accessing the objects are located. In the object ownership bucket, it is recommended that the “ACLs disabled” default option is selected because it ensures that the bucket owner automatically owns and fully controls every single object in the bucket.
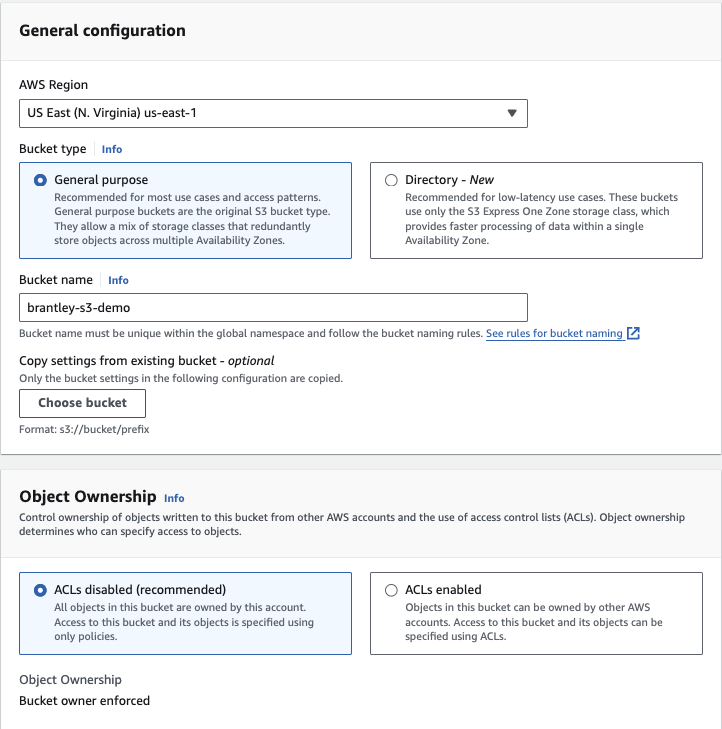
AWS recommends leaving the “Block all public access” default option turned on because otherwise your bucket would be accessible to the public, meaning anyone can access your files.
For this demo, I left the bucket versioning disabled. However, enabling bucket versioning could come in handy if you need multiple versions of an object so that older versions of the object can be recovered.
I didn’t add tags to this bucket but tags help organize buckets and keep track of storage costs.
I kept the default options for the “Default encryption” section. Server-side encryption is automatically applied to new objects stored in the bucket.

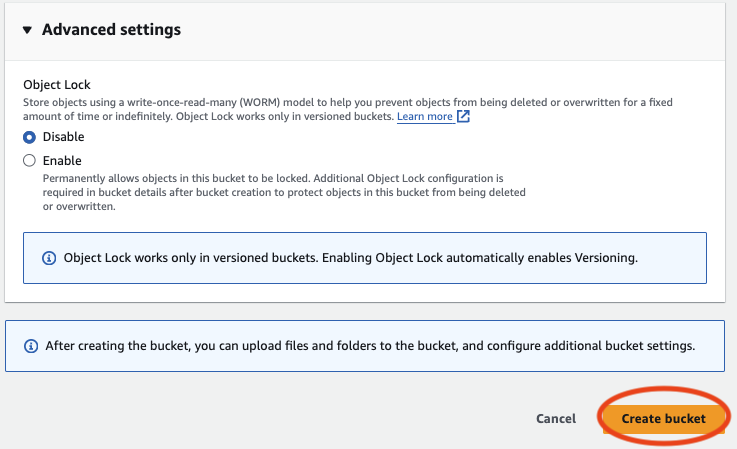
Object lock prevents objects from being overwritten or deleted. I kept the default option as “Disable”.
After reviewing these settings, I created my bucket.
After creating the bucket, I was led to this screen which shows that I successfully created my bucket. To go inside of my bucket, I clicked on the name shown here.

Below is what the inside of a S3 bucket looks like. From here, I went ahead and uploaded a few photos.

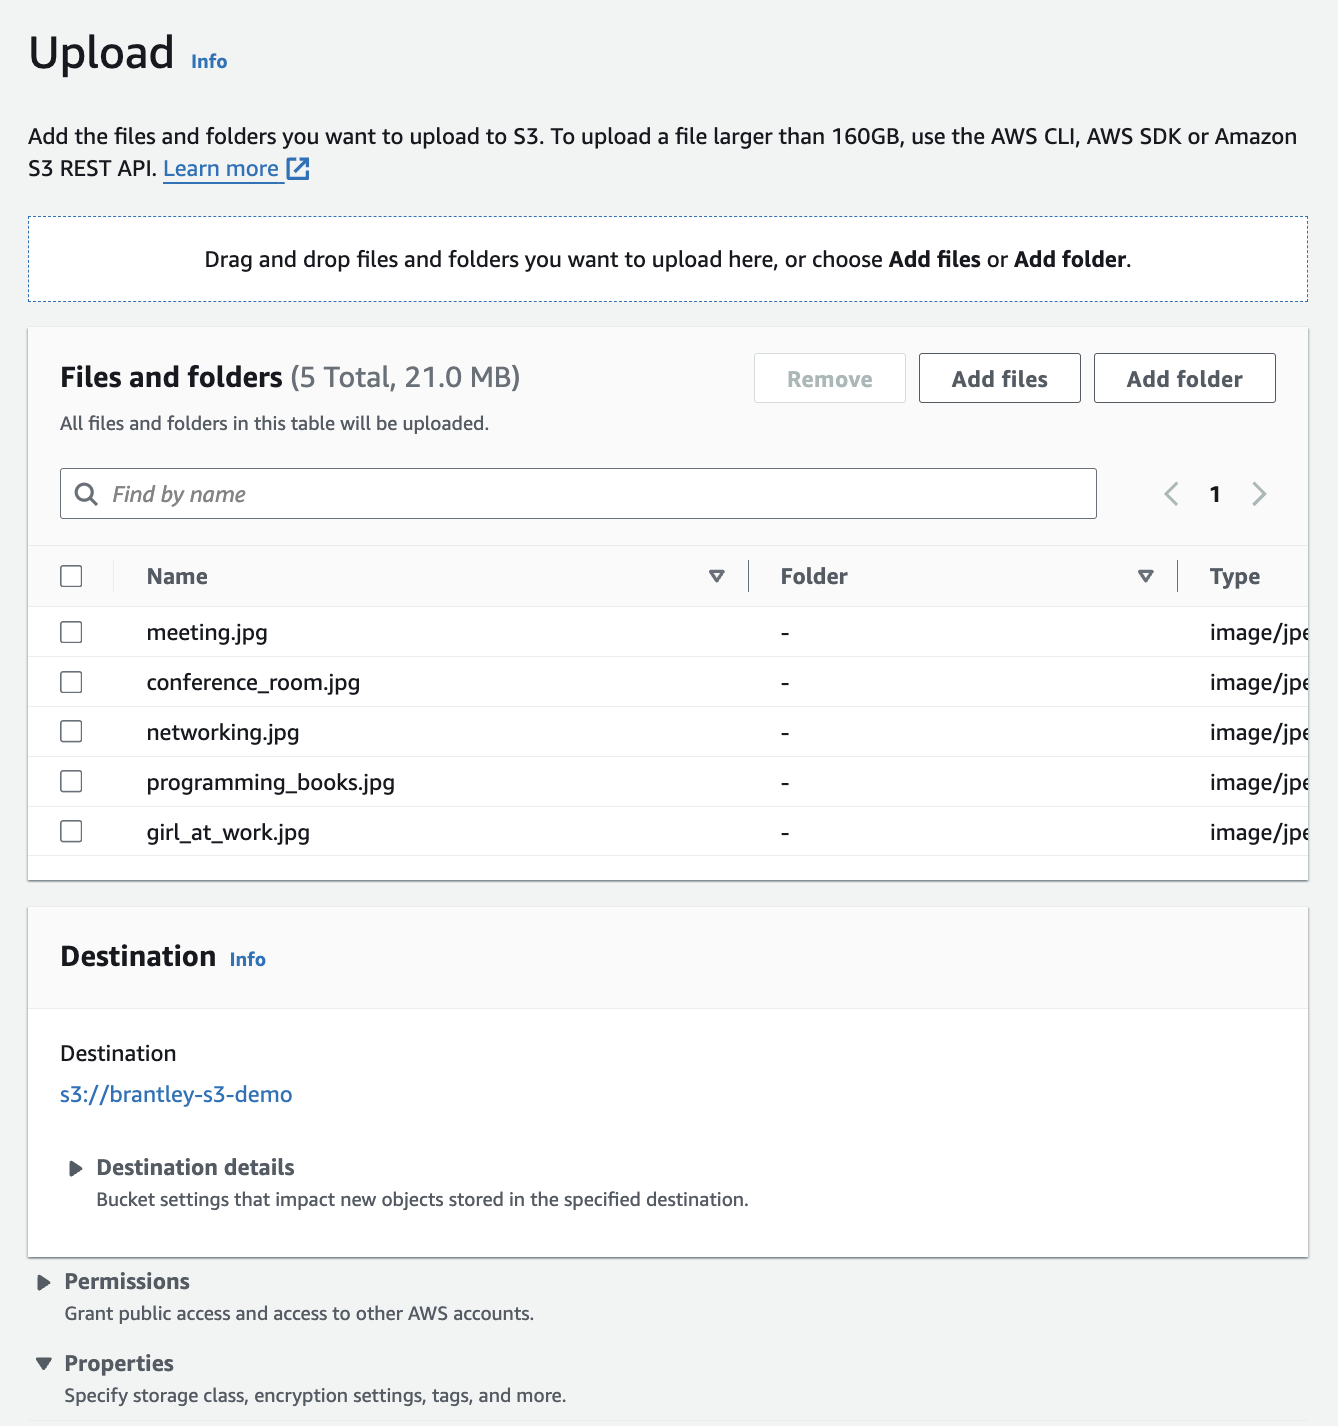
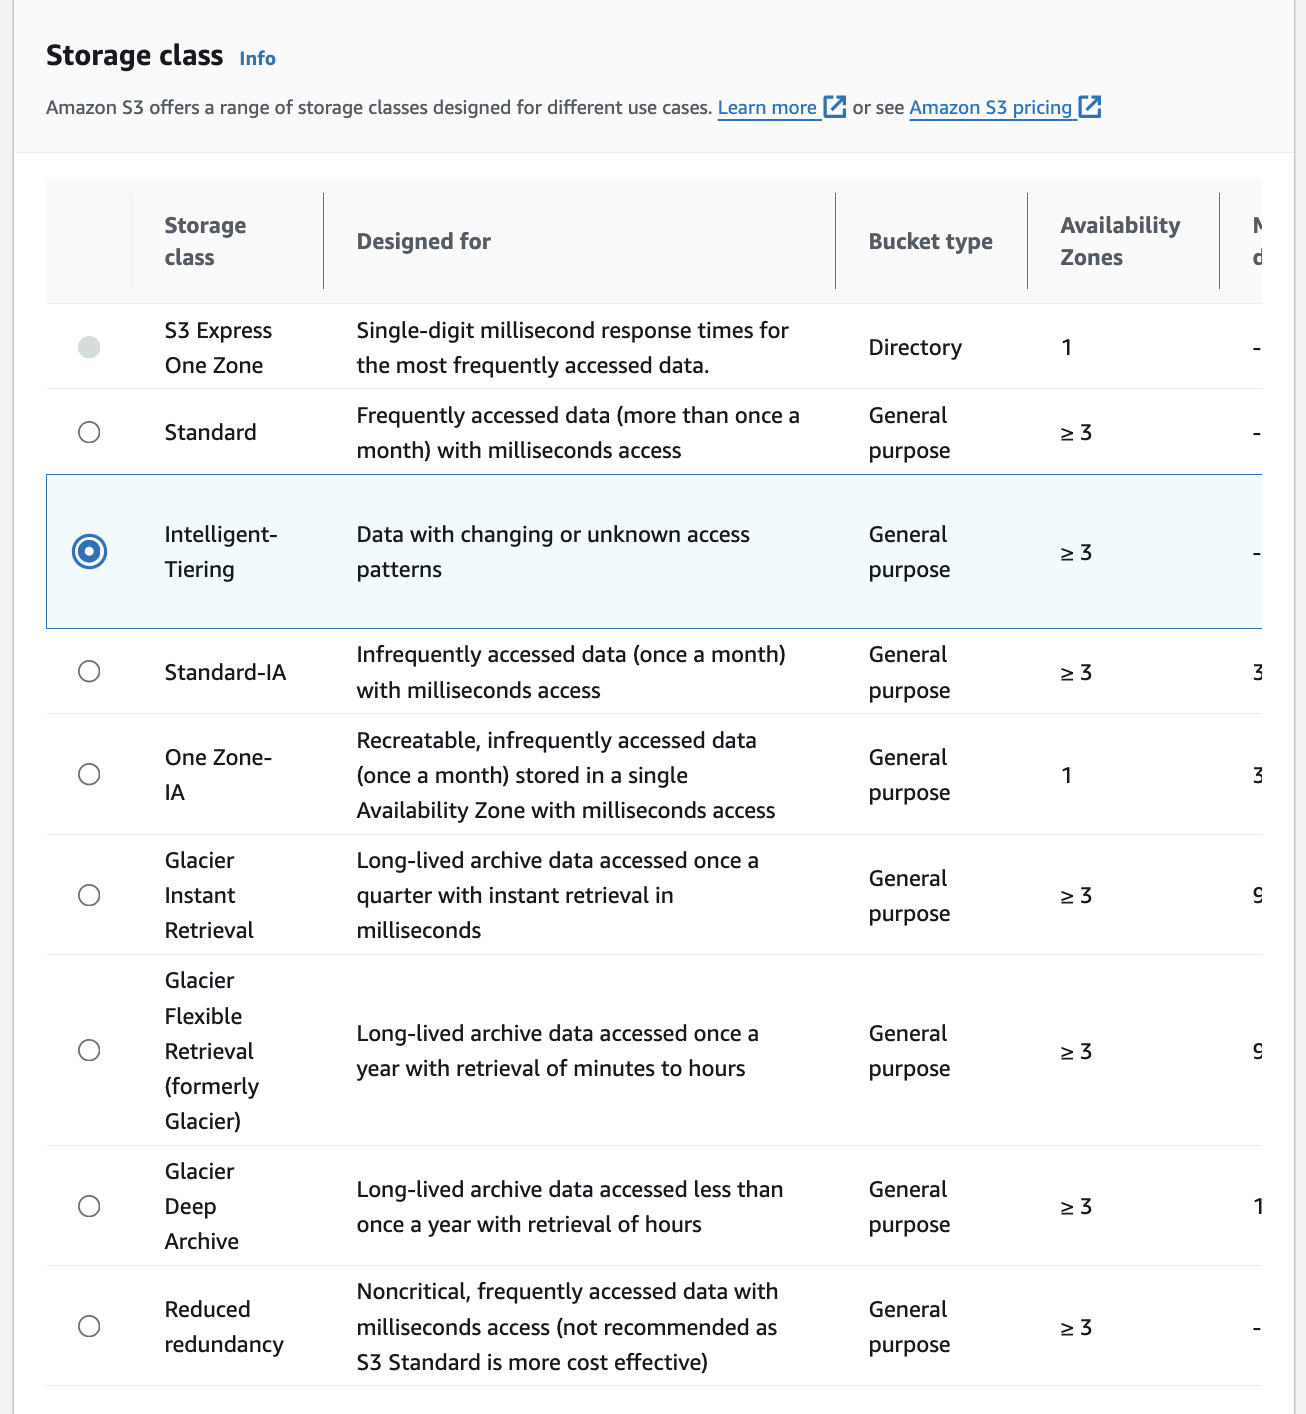
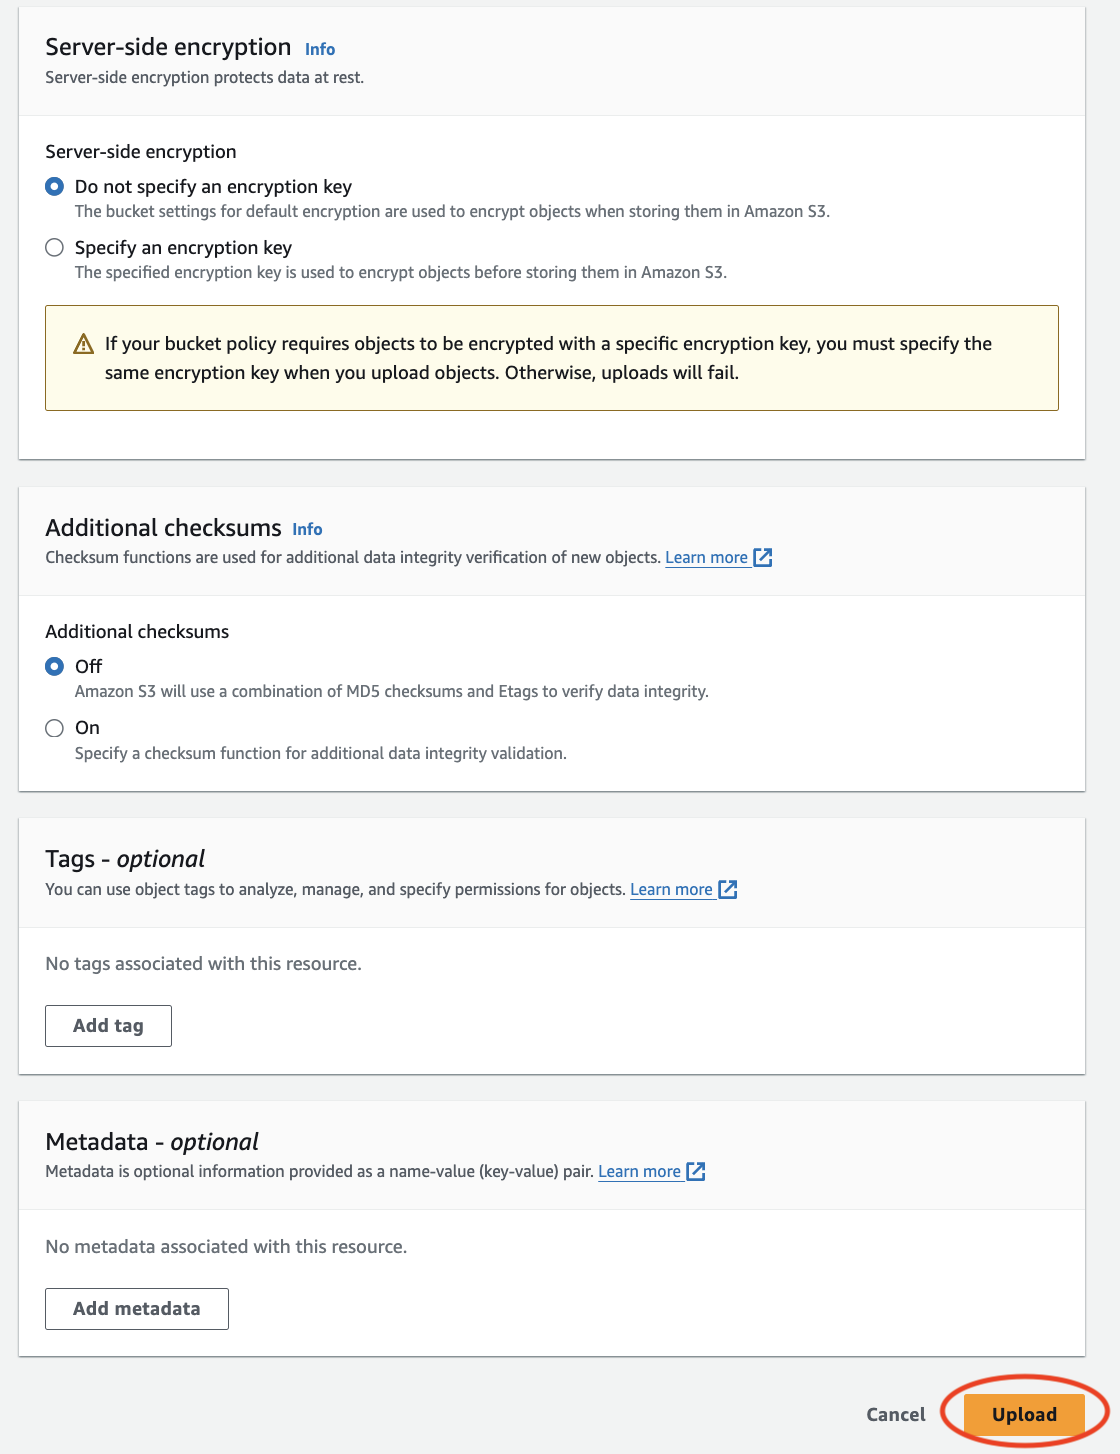
The following three photos show what the upload page looks like.
I added my five photos. Then, for storage class I selected Intelligent Tiering, which is designed to optimize storage costs by automatically moving data to the most cost effective tier. I left the default options for the “Server-side encryption” and “Additional checksums” sections. Additional checksums are used for additional data integrity. I left the “Tags” and “Metadata” sections alone. After reviewing these settings, I uploaded the photos.
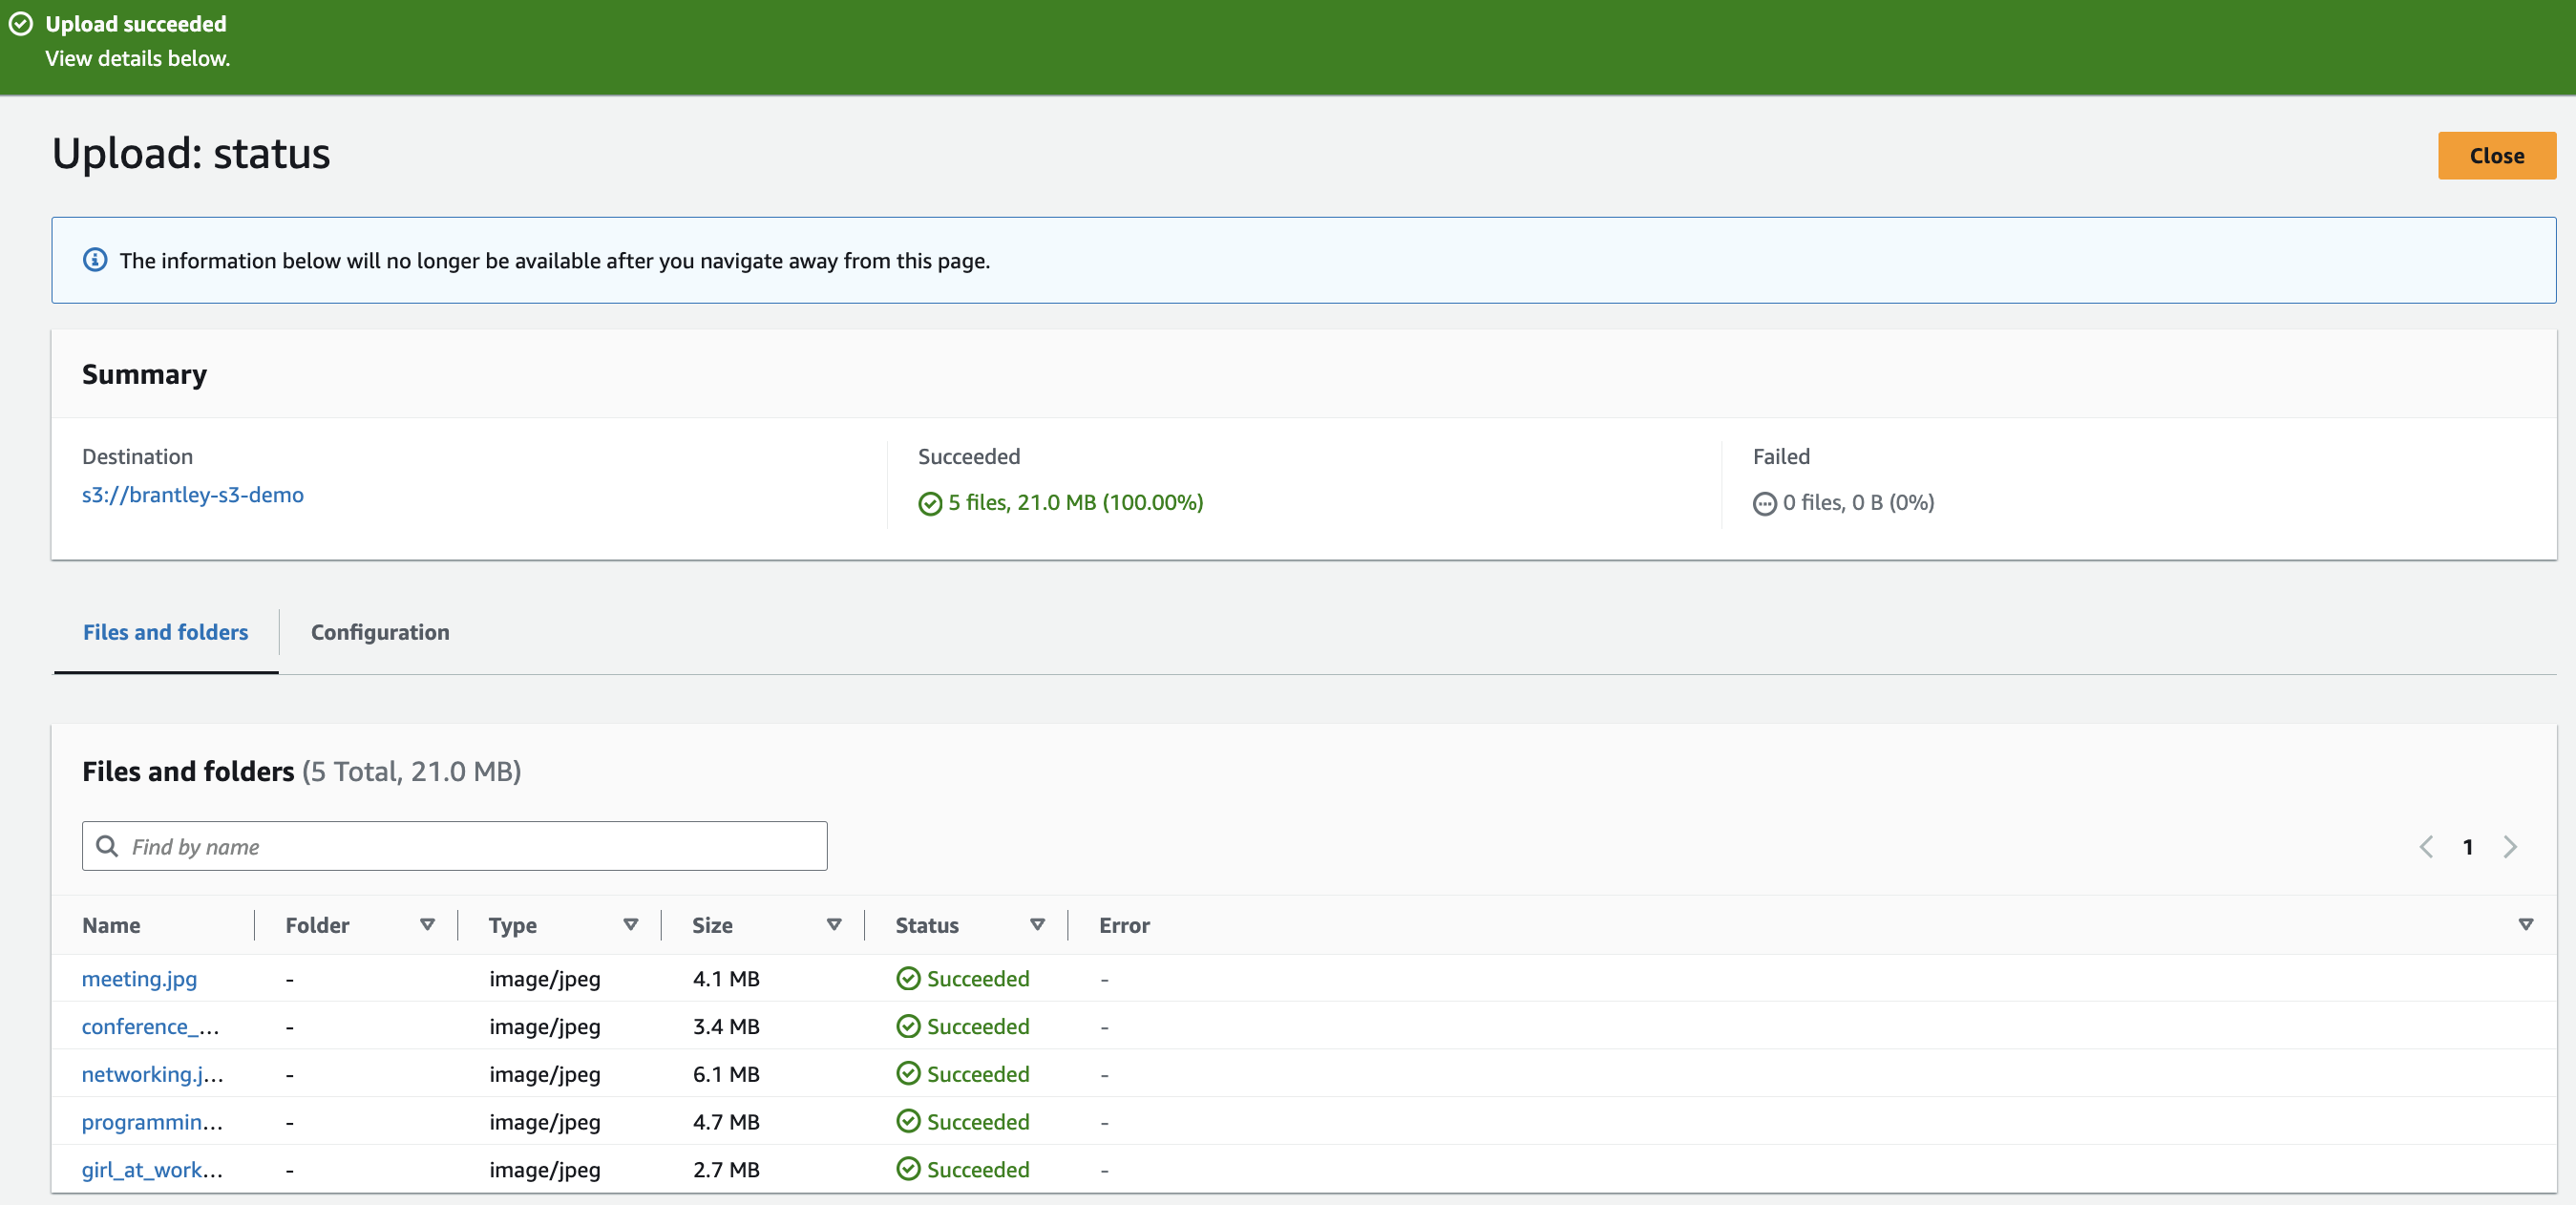
This is what a successful upload looks like.
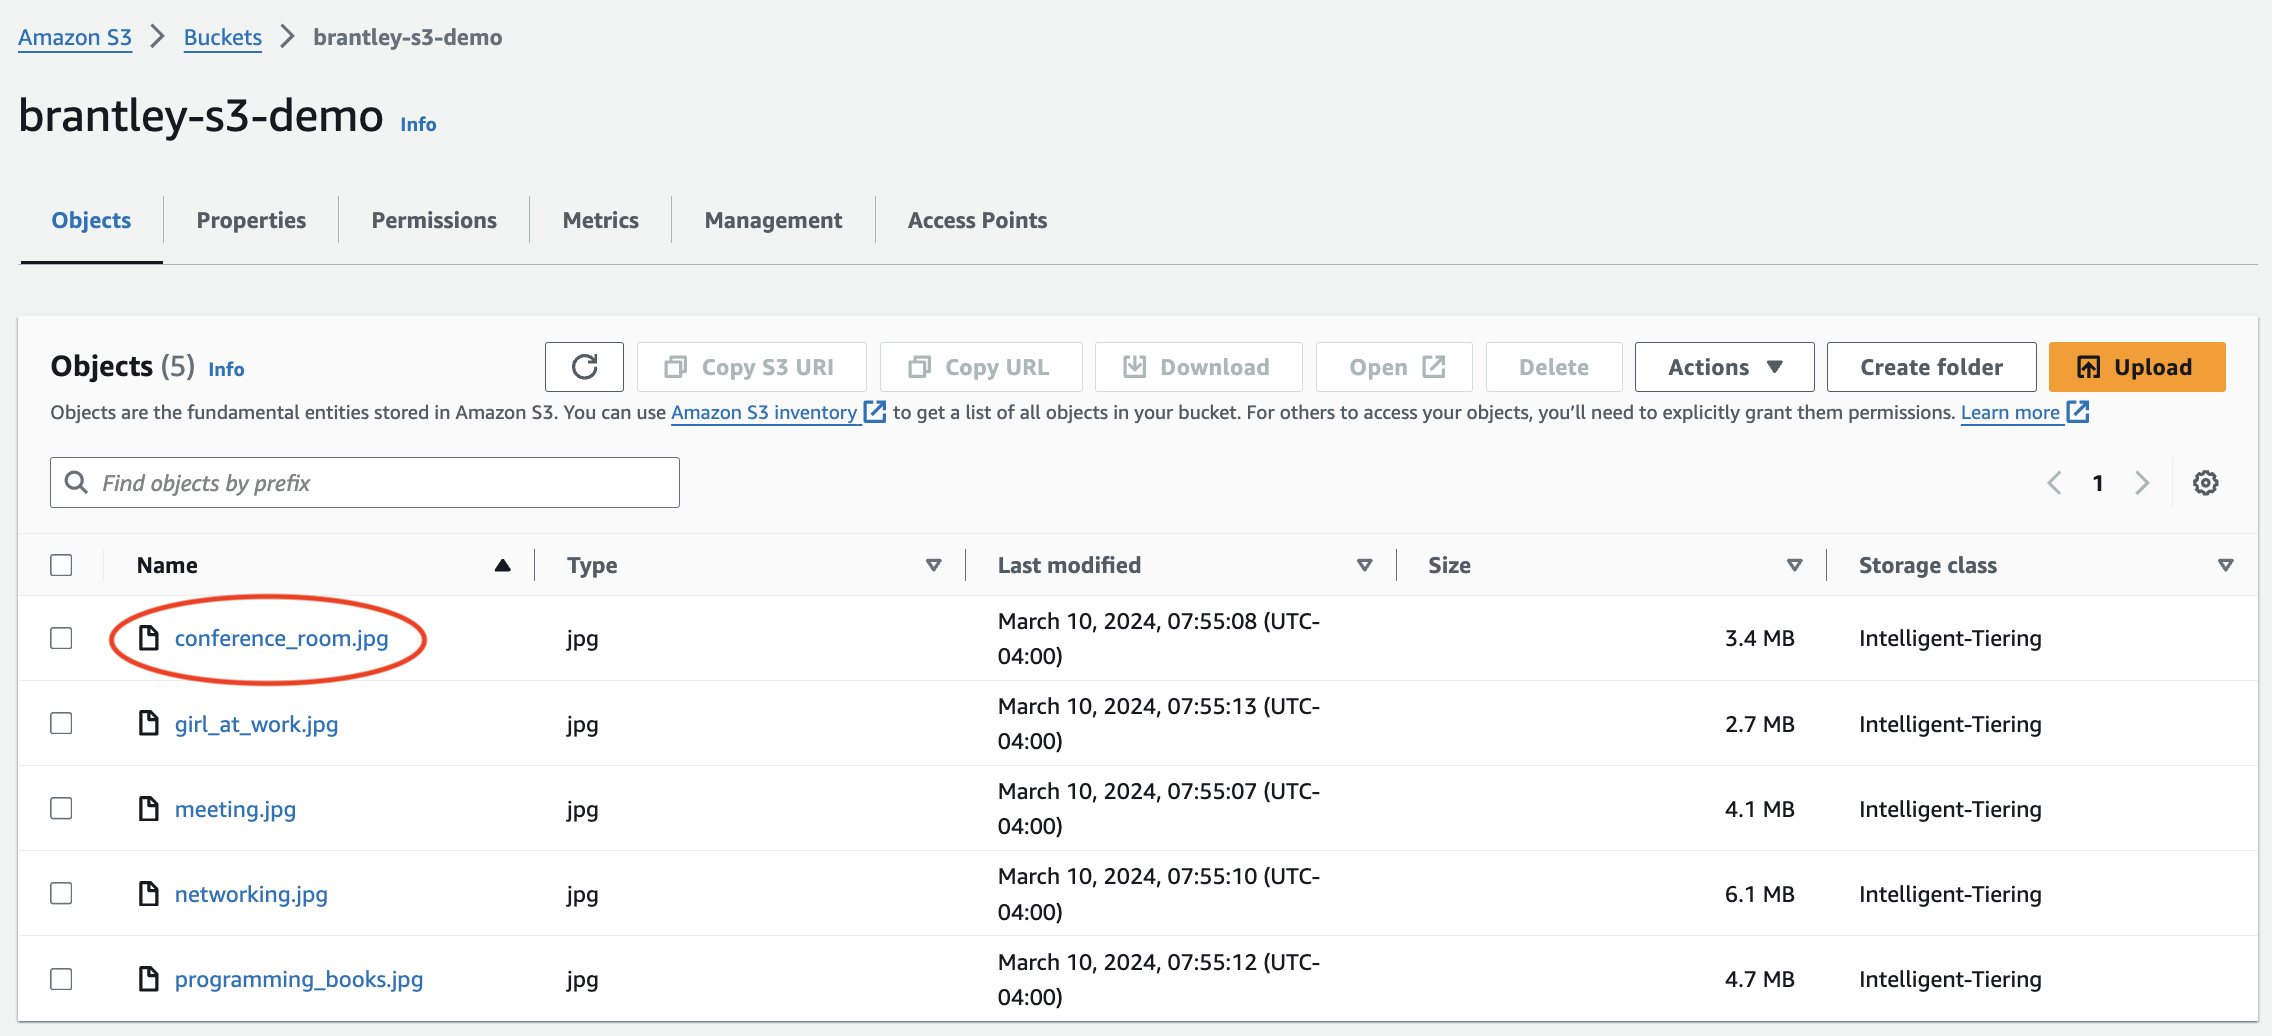
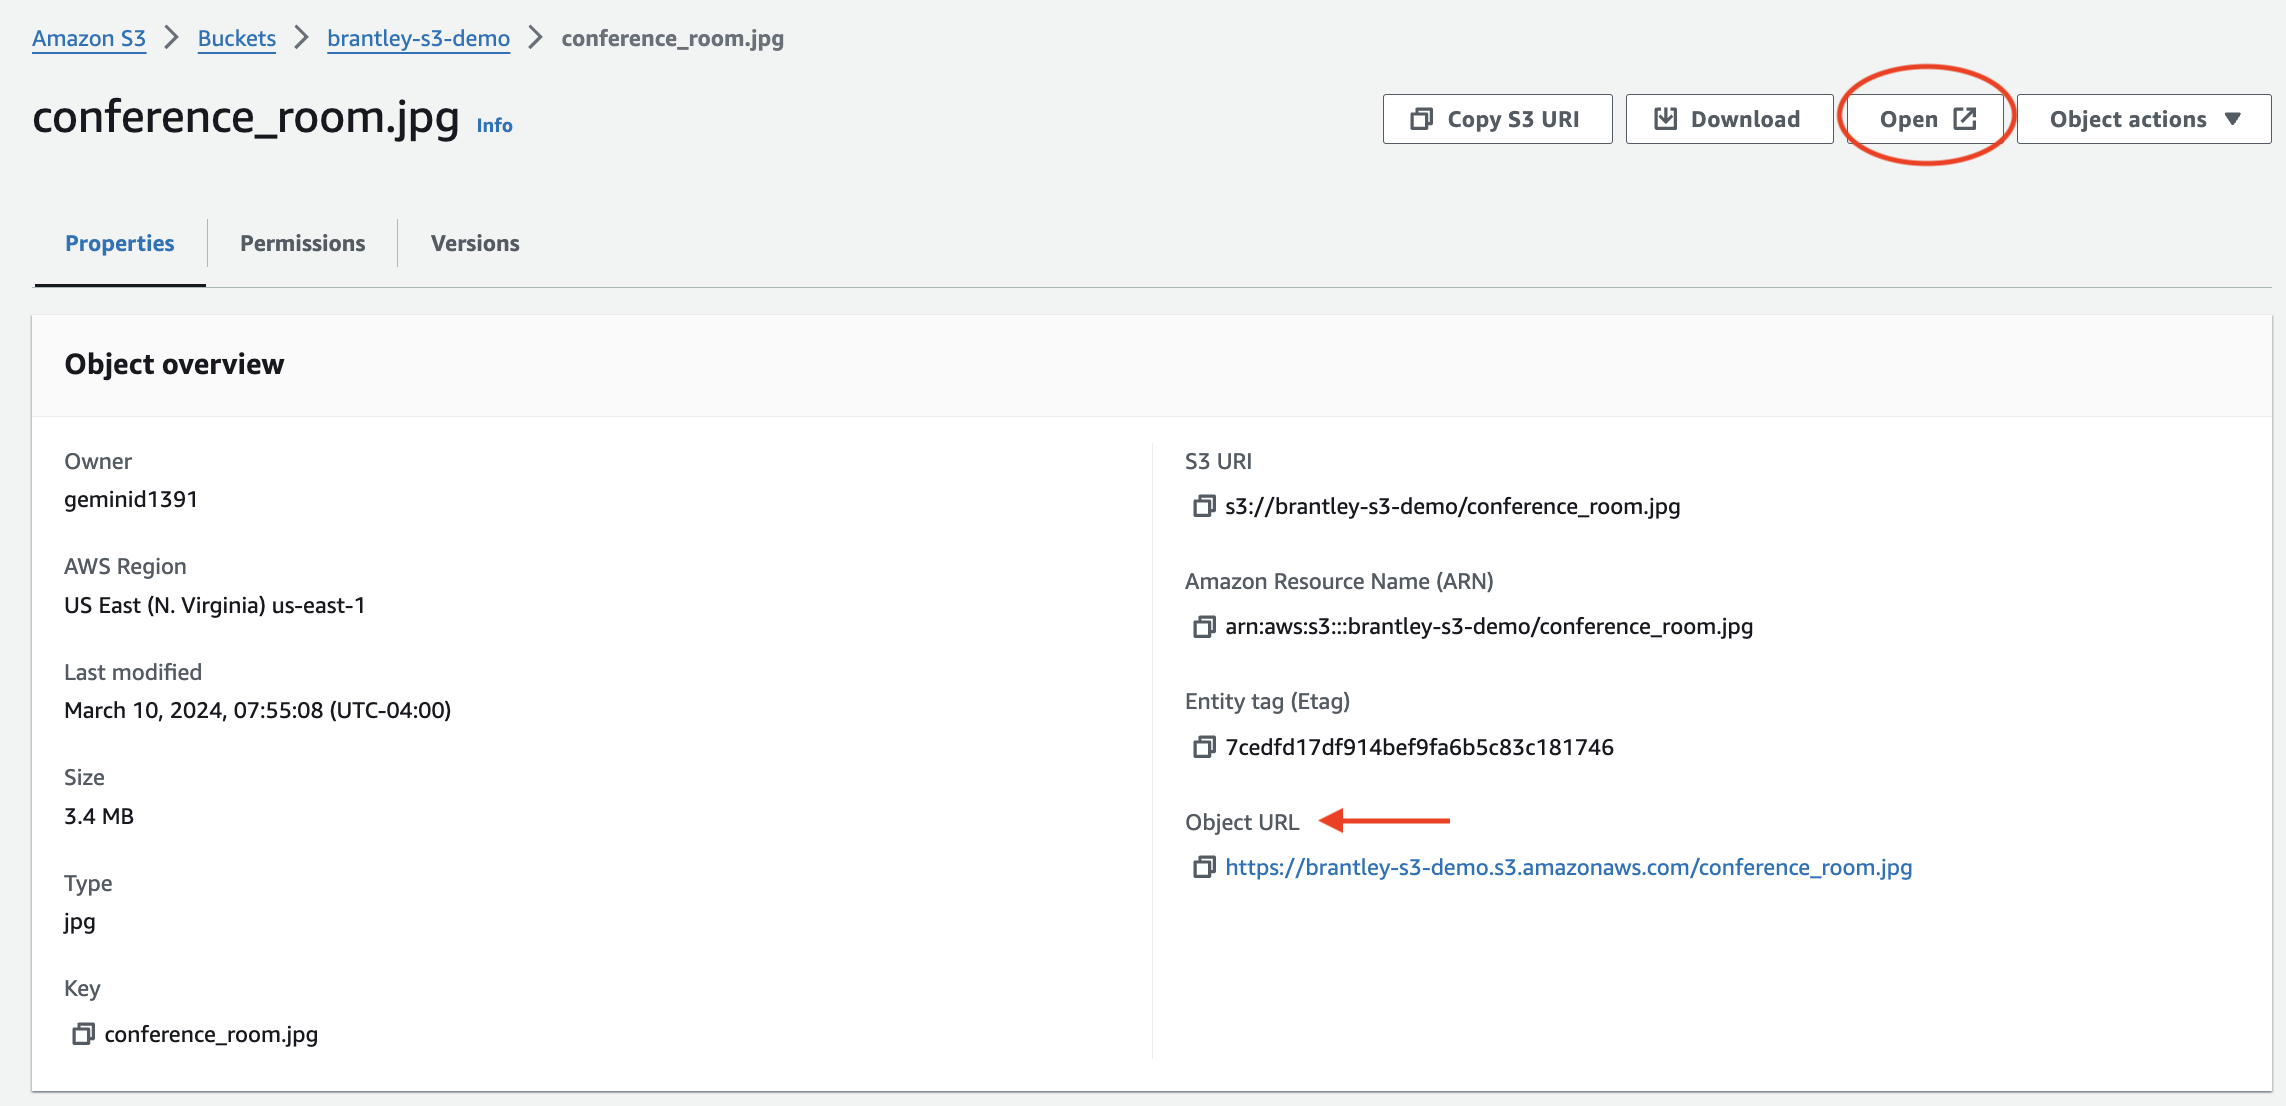
Closing the page above led me to the my bucket page. To see the details of the object, I clicked on the object’s name. To view the object, I selected “open” which opens the object in another browser tab. Notice that the object has an Object URL, however, I cannot view my photo through this link because I disabled public access to my bucket.
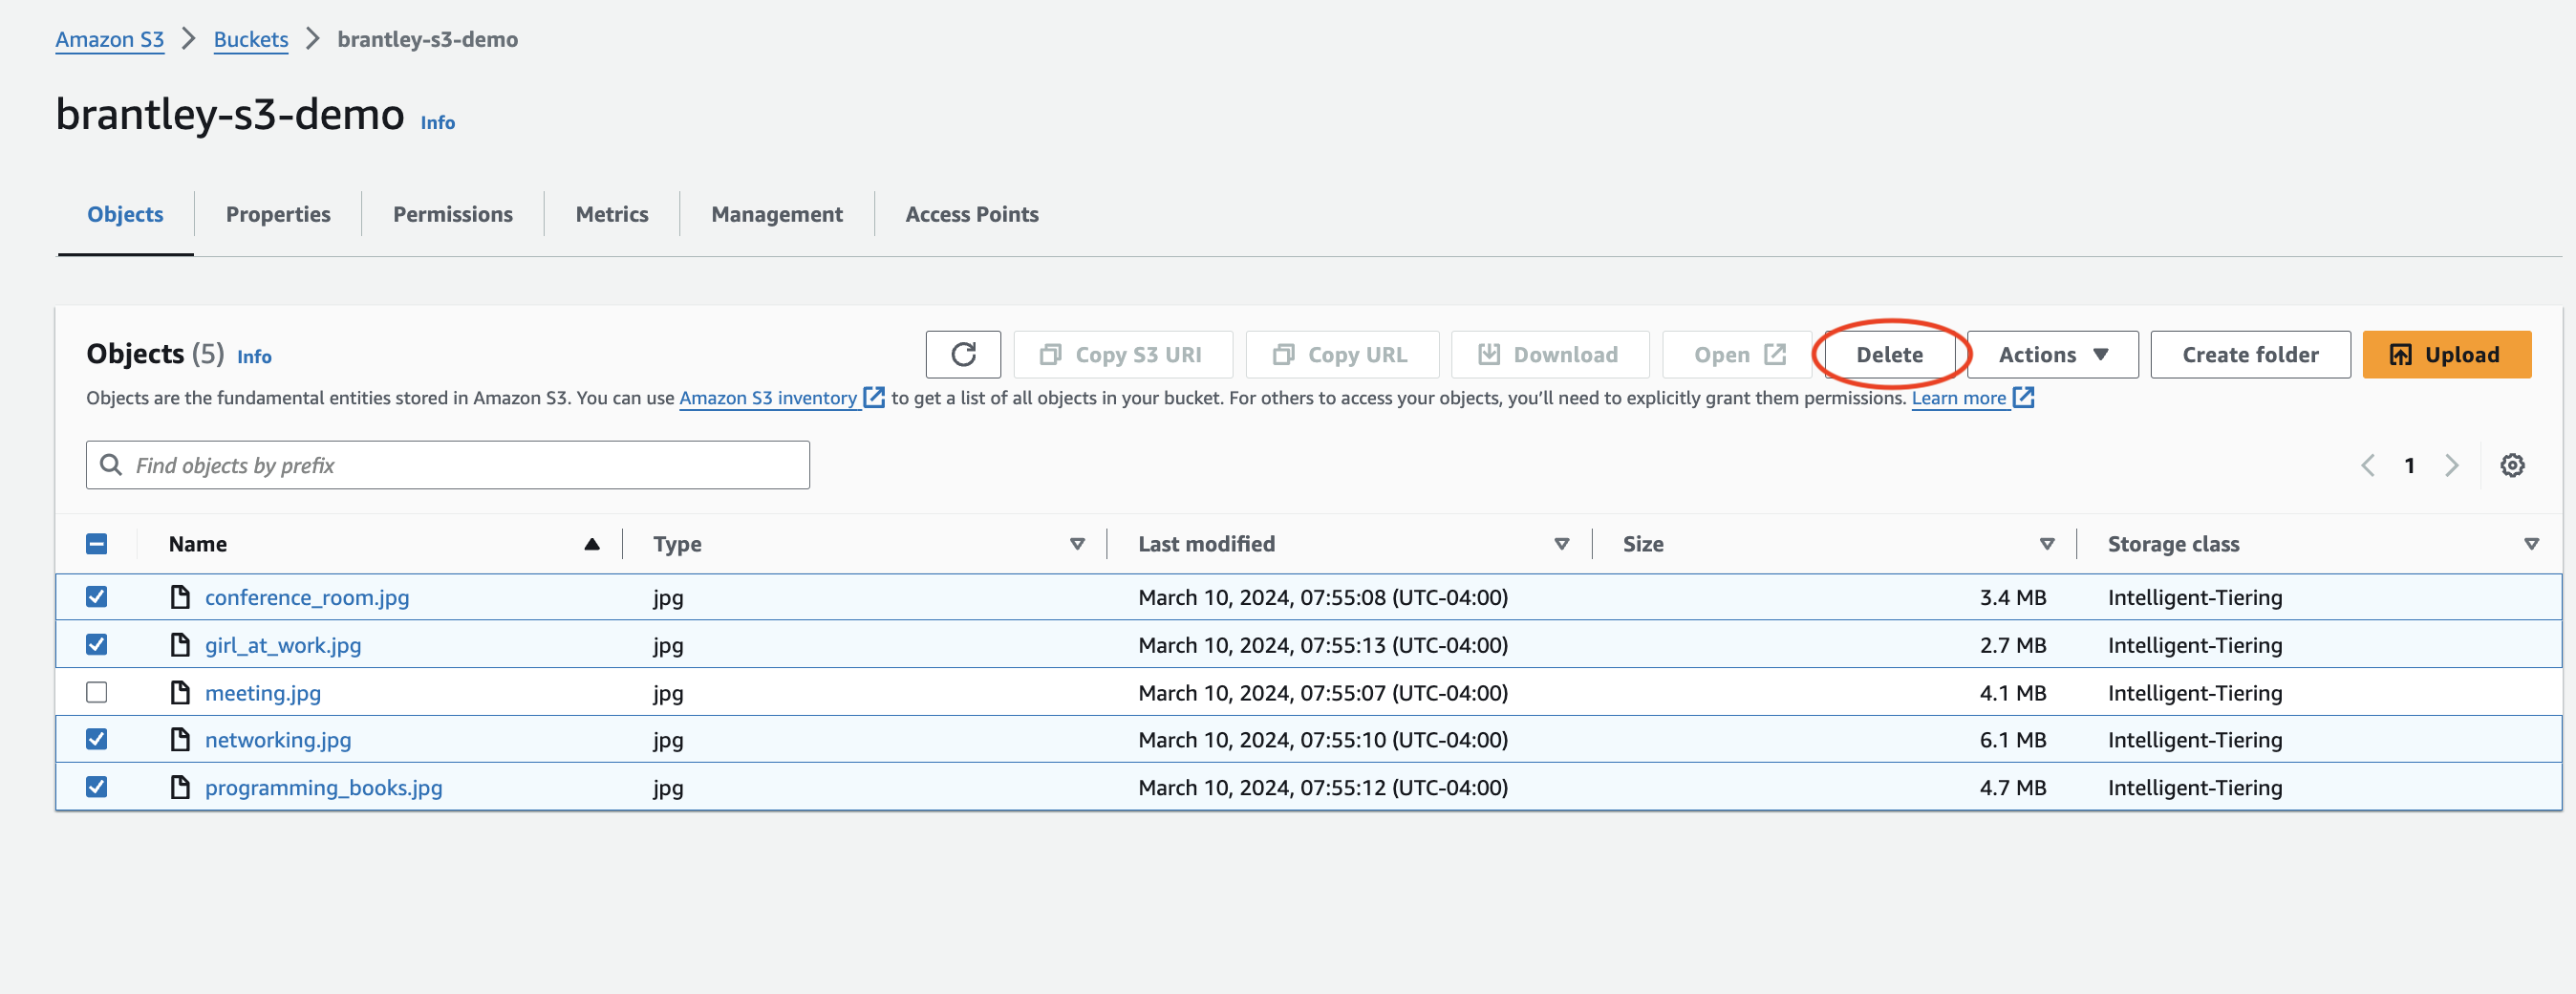
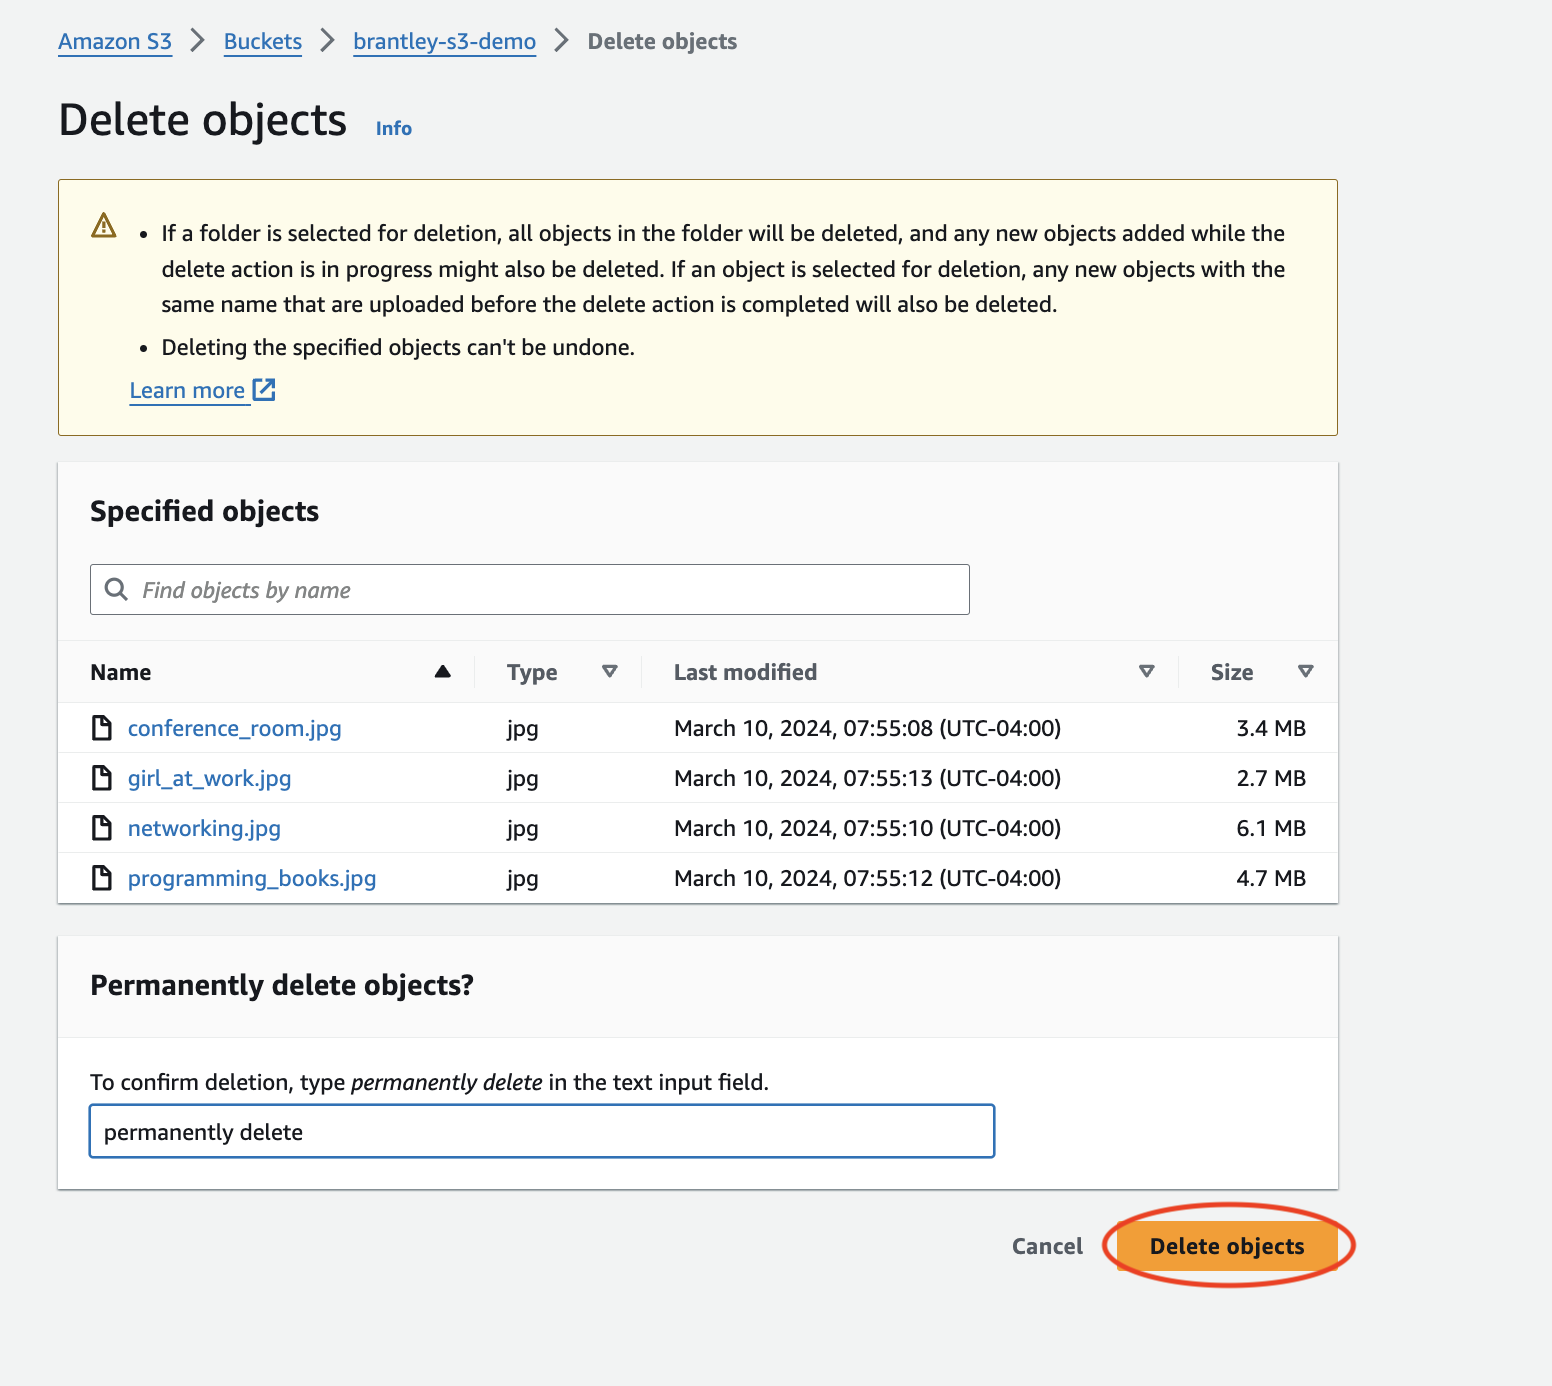
After navigating back to the my bucket page, I began deleting all but one of my photos by selecting the photos I wanted to delete and clicking on the delete button. I was taken to the Delete objects page where I typed “permanently delete” and clicked on “Delete objects” to delete the objects.
I was then taken to a page where I was informed that my deletion of the photos had been successful. After closing that page. I was led back to my bucket page where as you can see I now have only one photo in my bucket.
An important note about buckets is that to delete a bucket, the bucket must be empty. I would have to delete the file in my bucket before deleting the entire bucket.

And with that, days 9-10 of the challenge are complete!
I felt really good about this prompt! I learned a lot more about S3 than I had initially anticipated. Look out for more S3 content as I continue this challenge!