For Days 24-25: here’s the following prompt:
IAM User creation and policy: Create several users, create different permissions and add policies for each person, and make sure to note and access/secret keys that are created. Also make sure you delete the user to avoid leaving unnecessary access keys on your account!
Using this video as a guide, I was able to successfully create IAM users and policies.
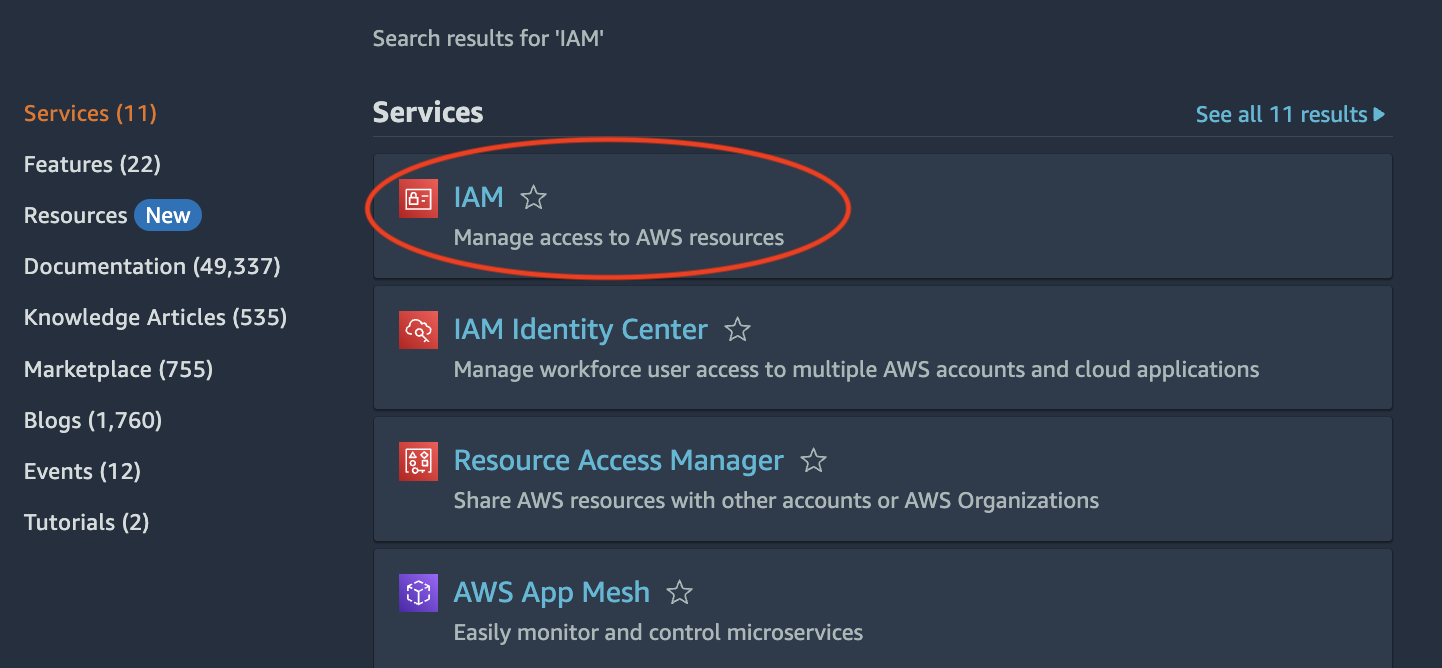
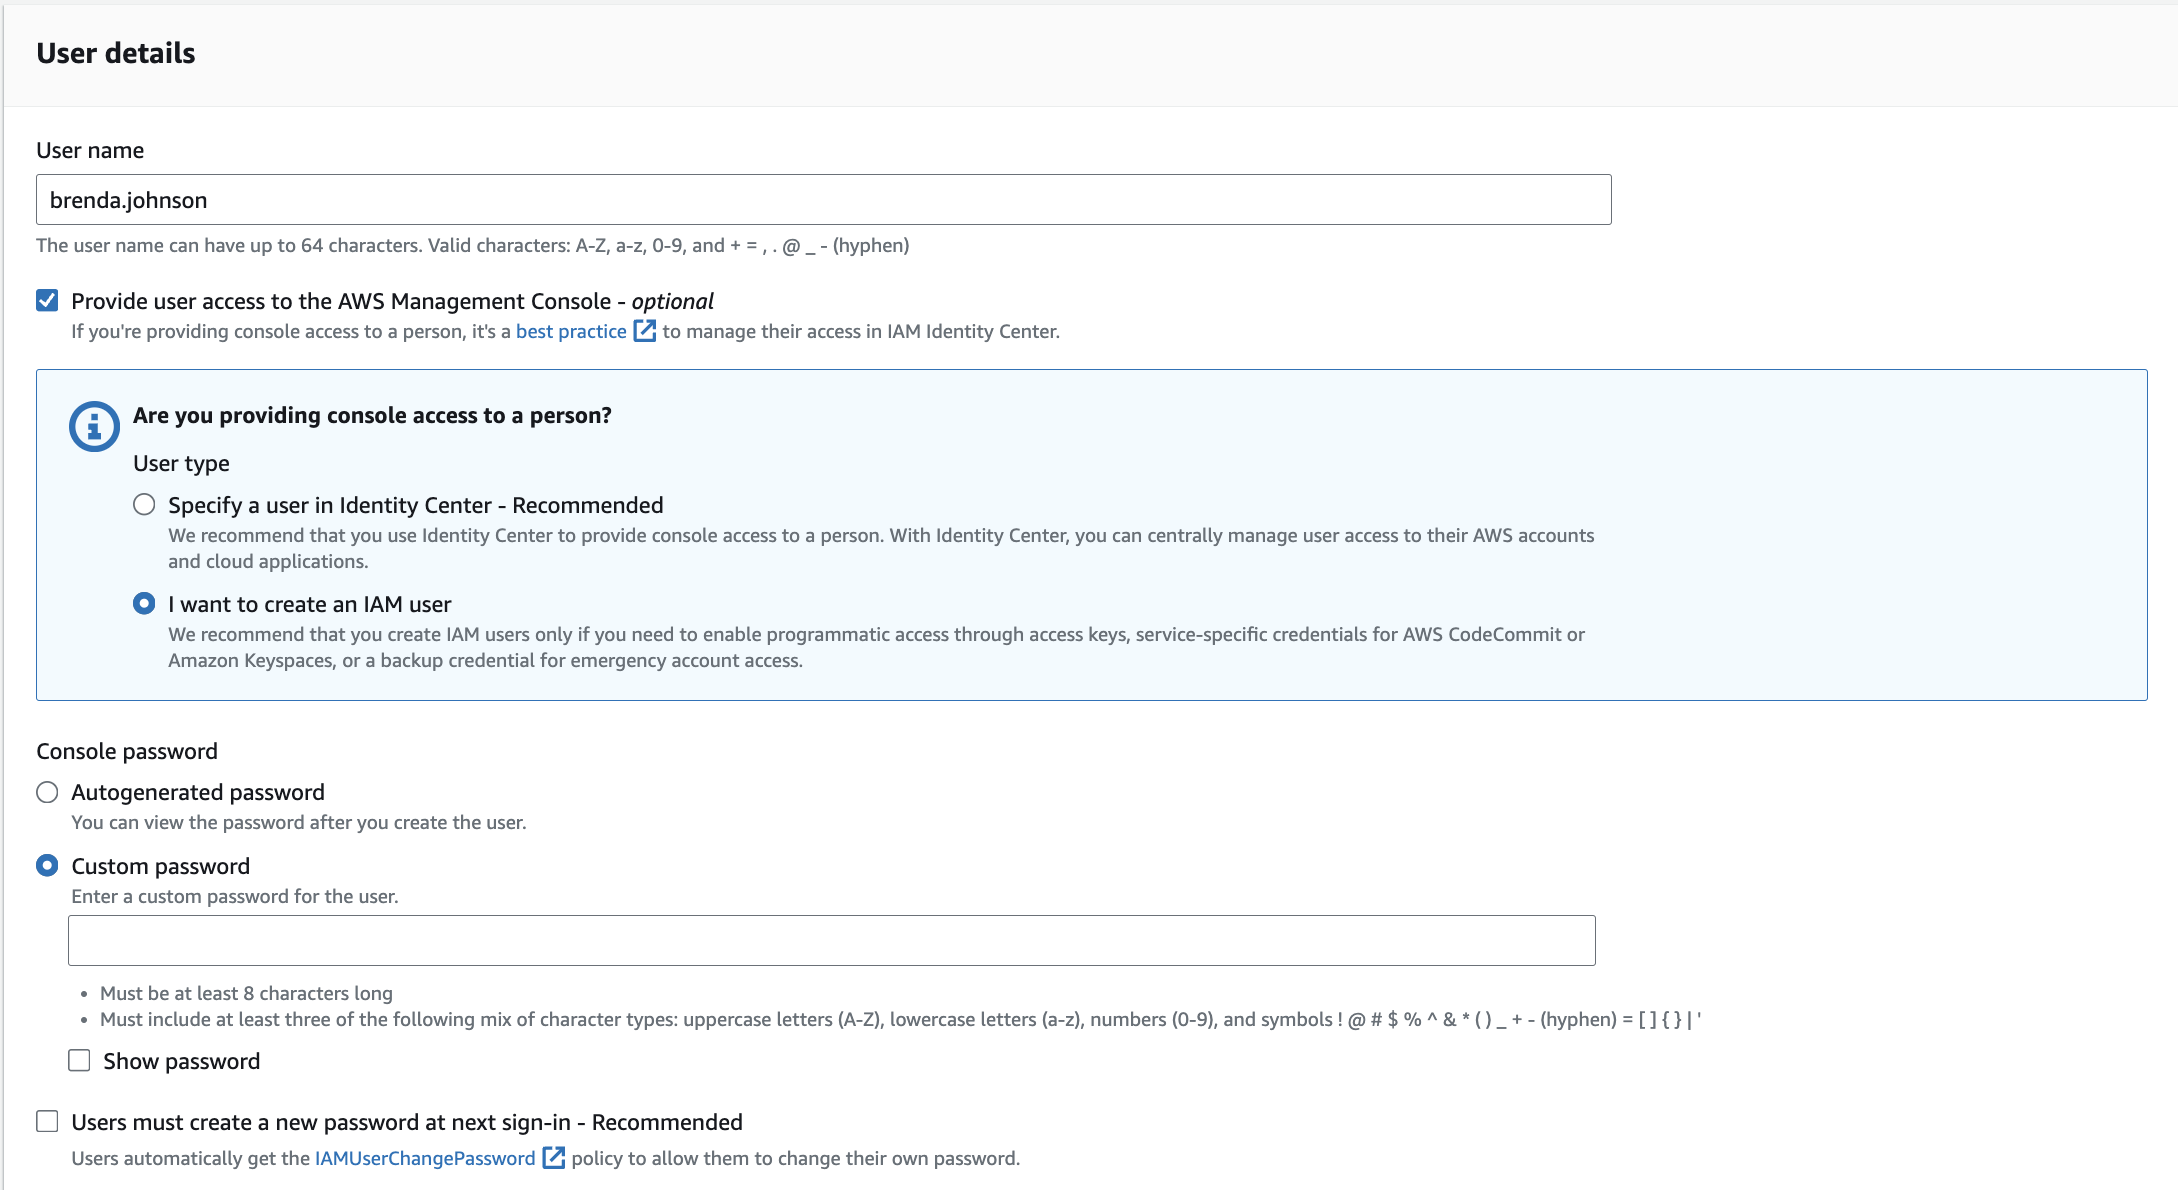
First, I navigated to the console to search for IAM. I clicked on IAM and clicked “Users” on the menu located to the left on the IAM page. I then hit “Create User” and began to create my user named Brenda Johnson, who is a developer.
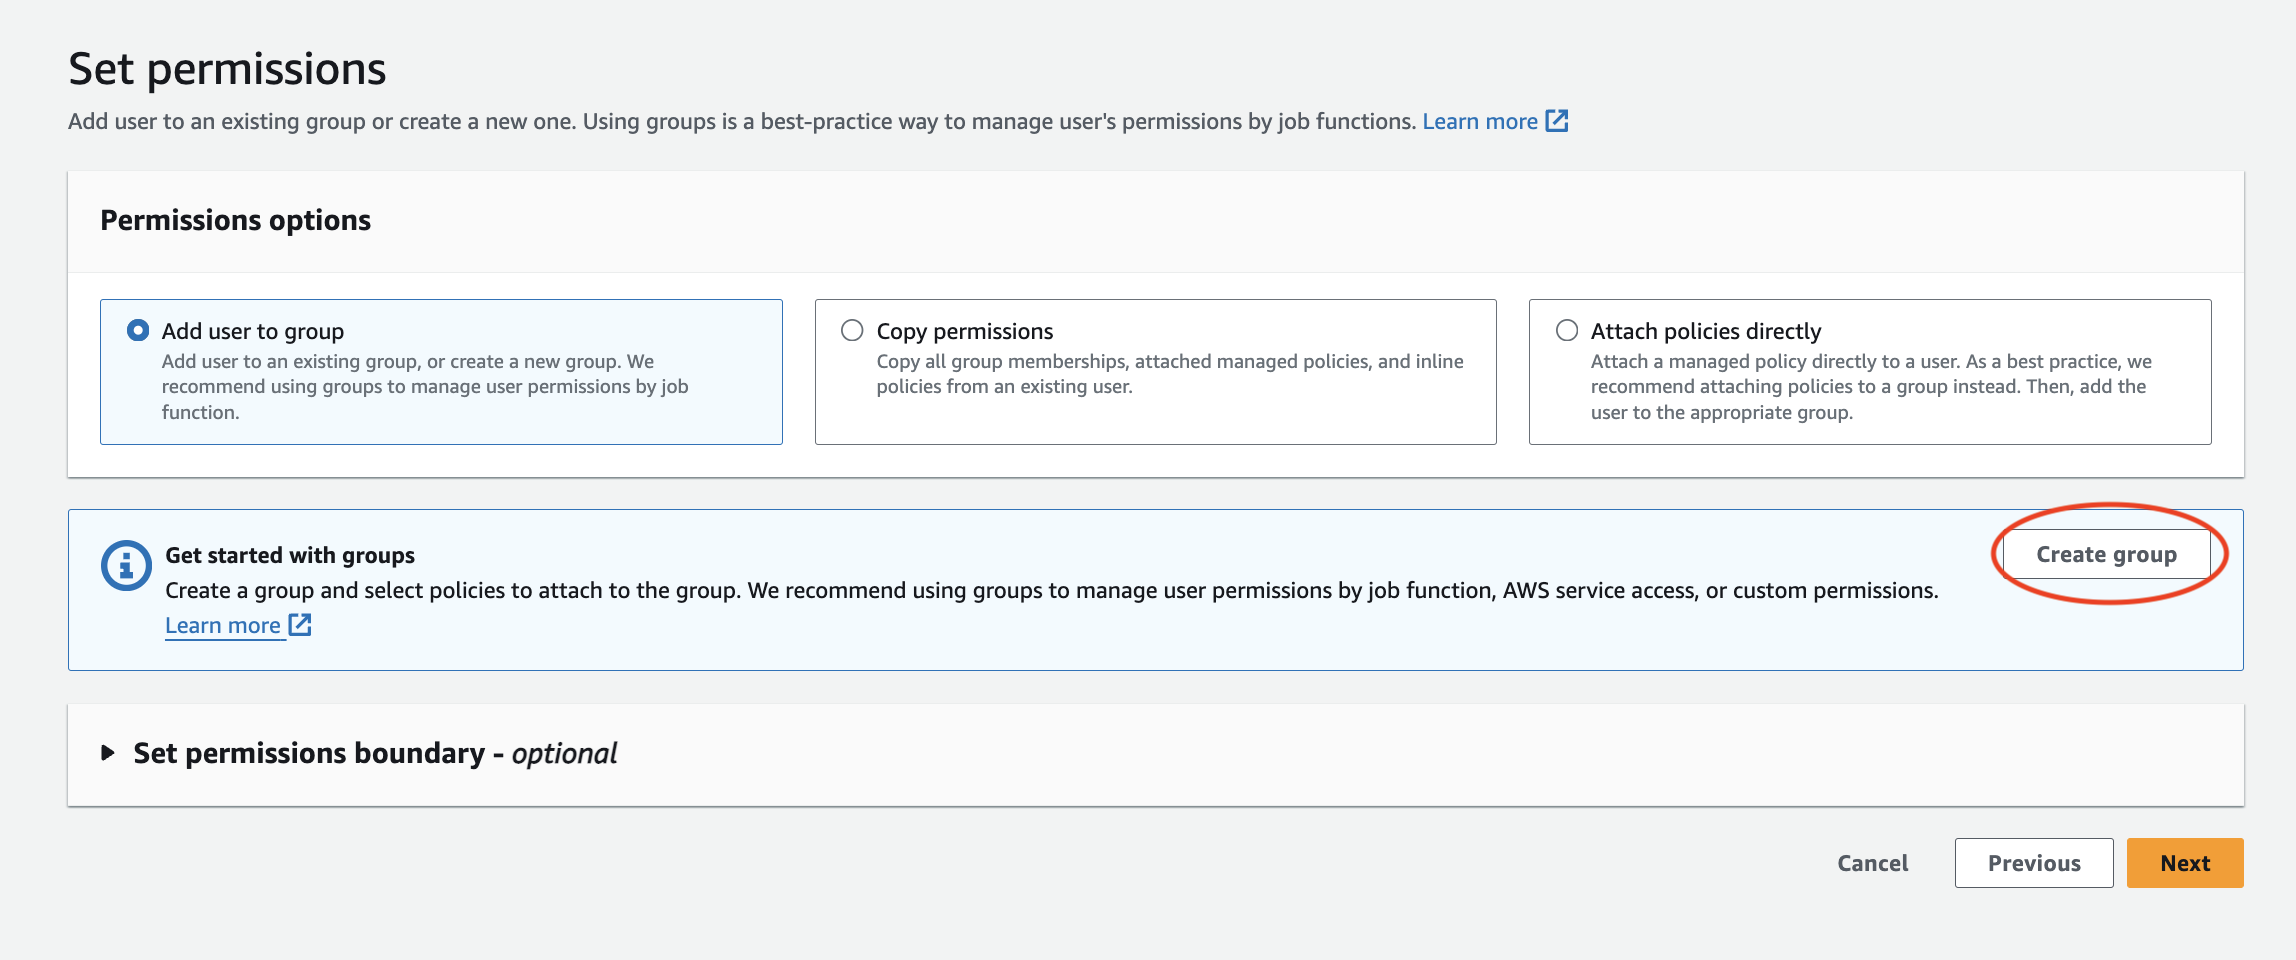
After hitting “Next”, I was led to the “Set permissions” page. Out of the permissions options listed, I decided to create a group called “Developers”. It is considered best practice to create a group, attach the policy to the group, then add the user to the group. This group was given full access to S3, DynamoDB and Lambda via the Permissions policies.
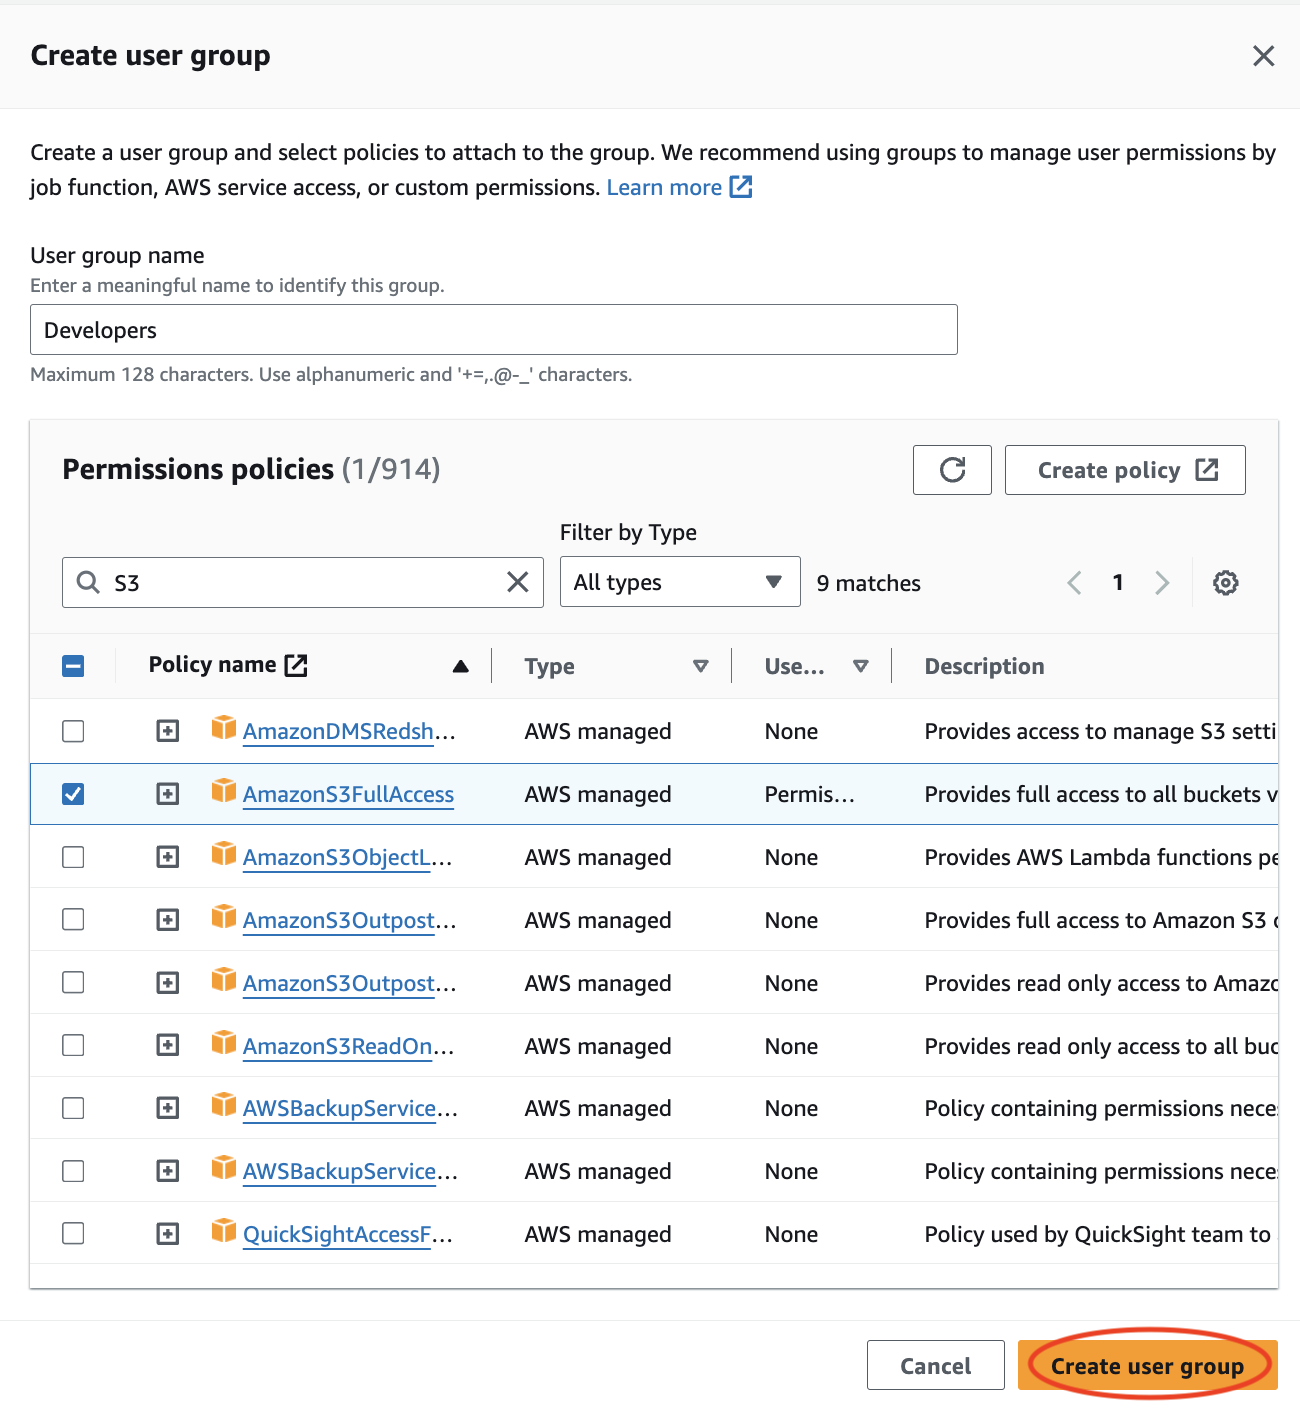
After creating the group, I added Brenda to the group by selecting the group name before moving on to the next page.
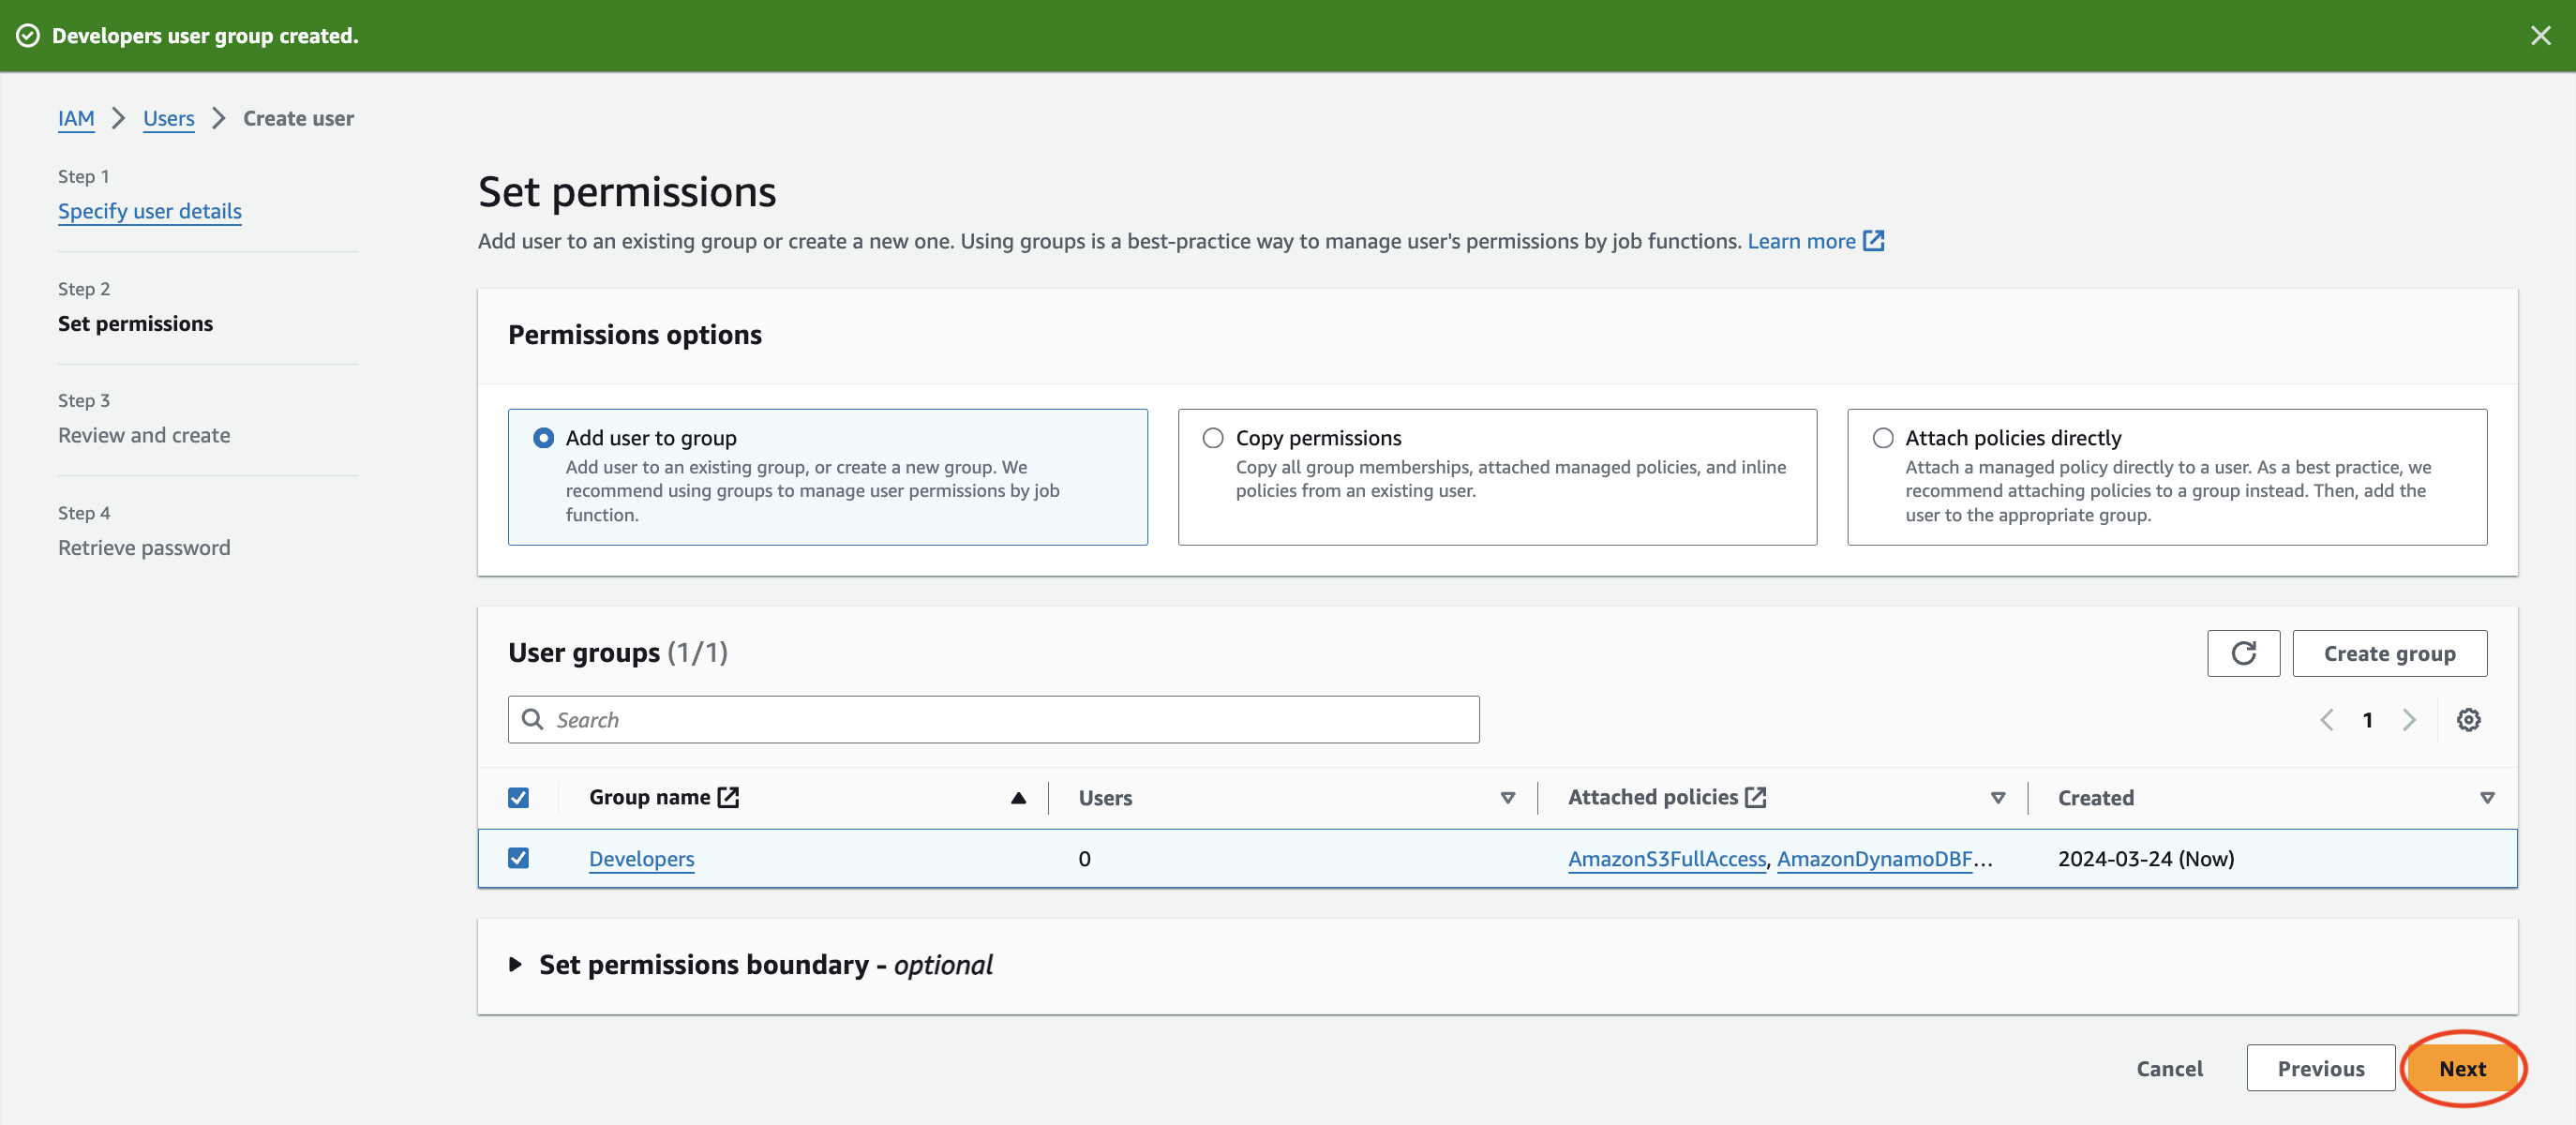
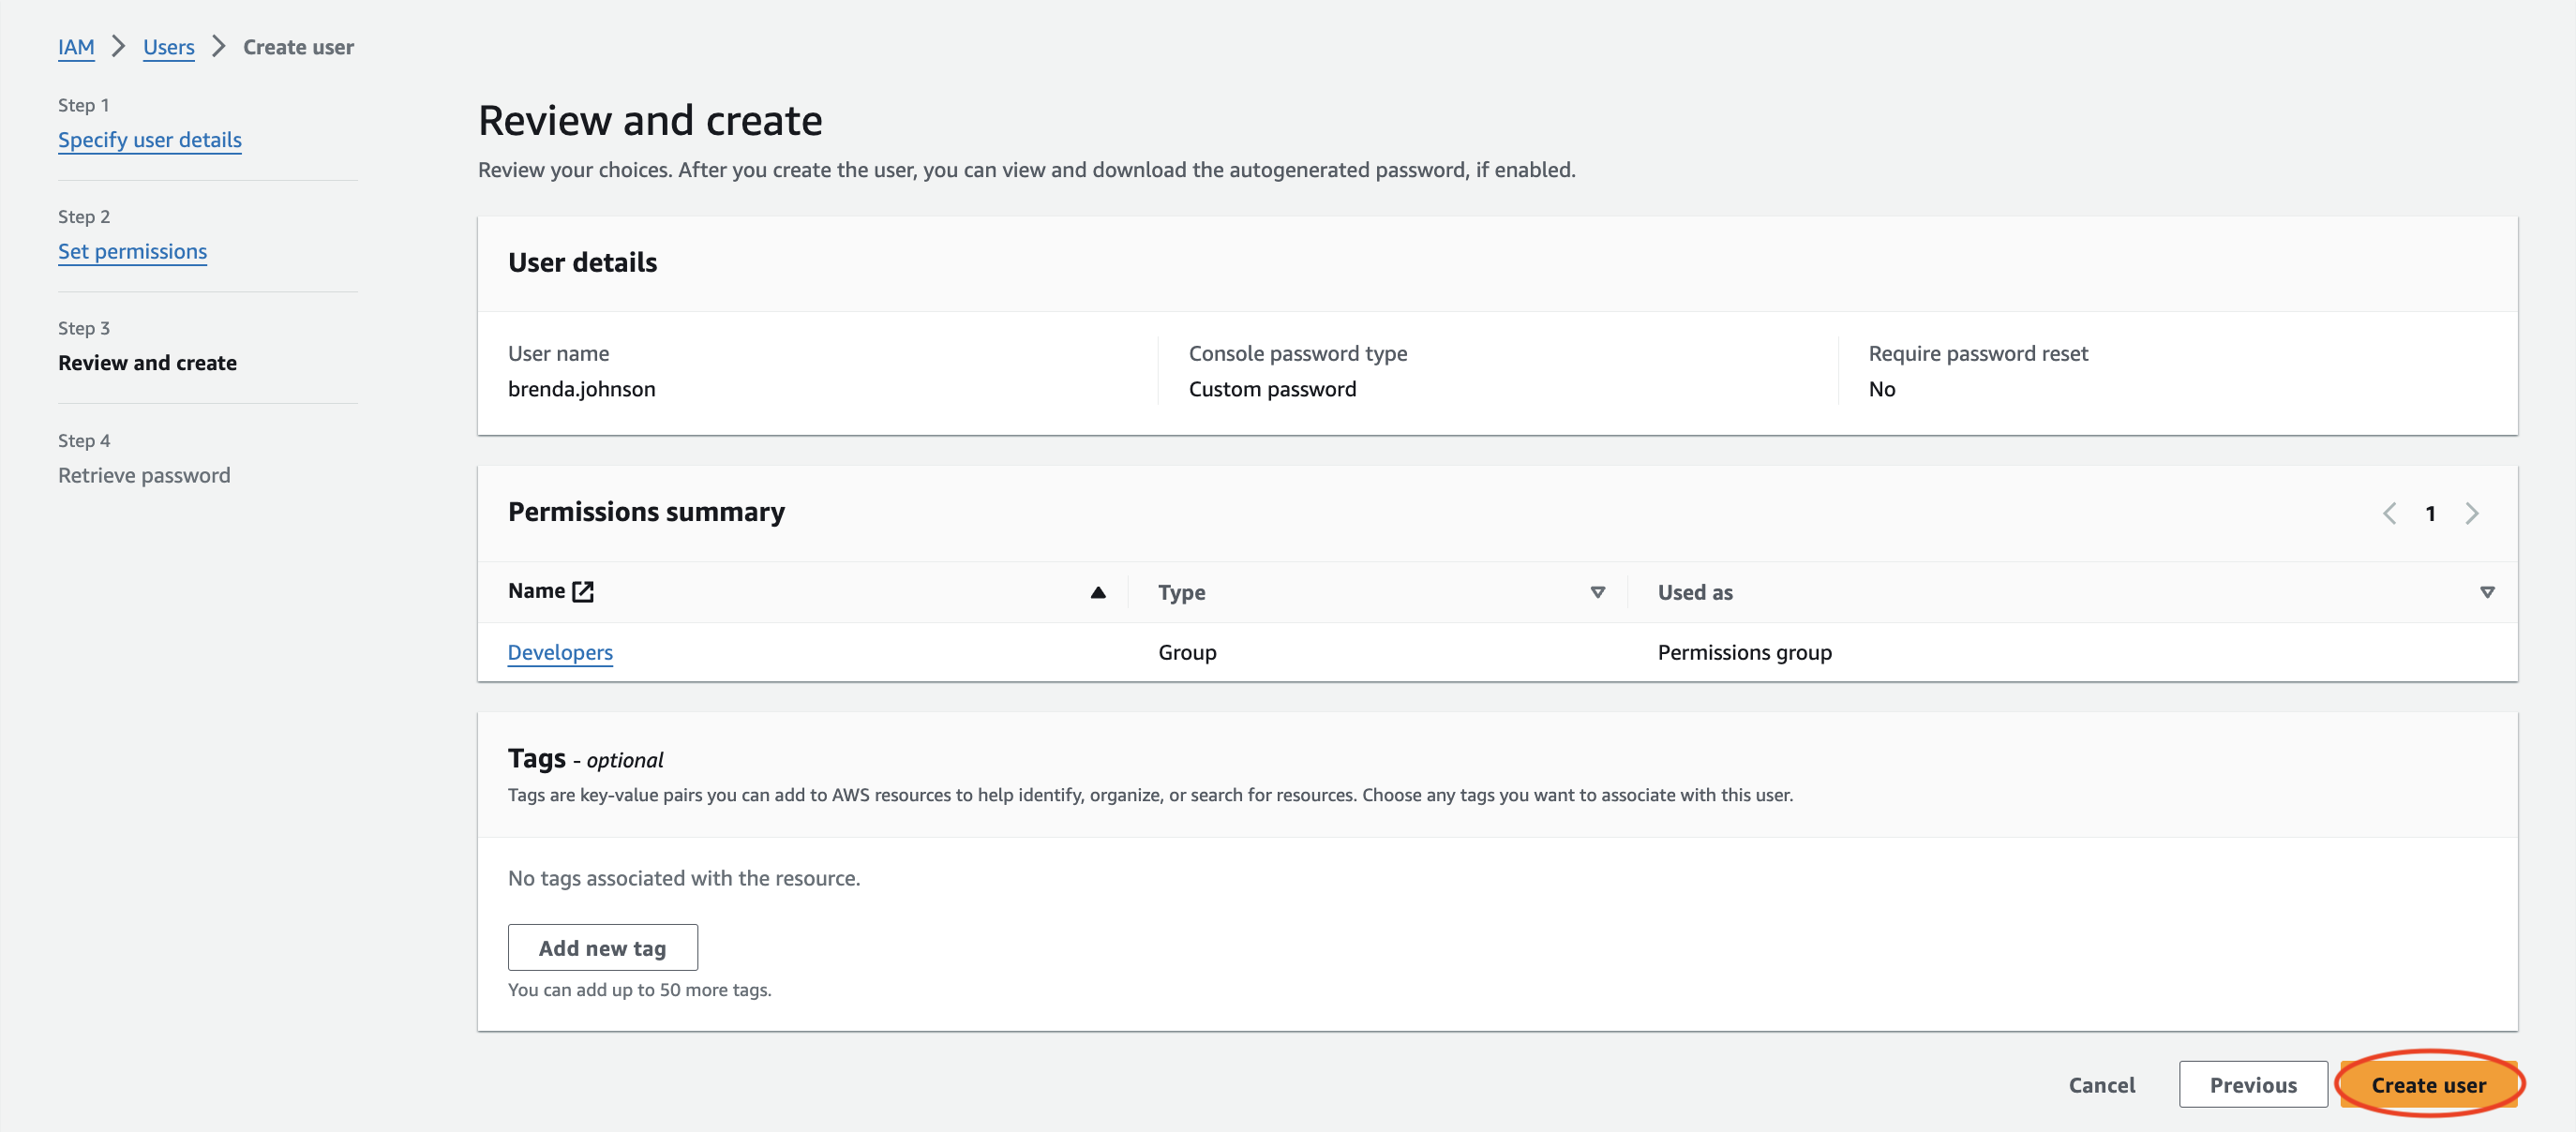
After successfully creating the “Developers” group, I went to the next step which was the “Review and create” page. Before moving on, I reviewed the user details and permissions summary. I then clicked “Create user” and my user, Brenda was created.
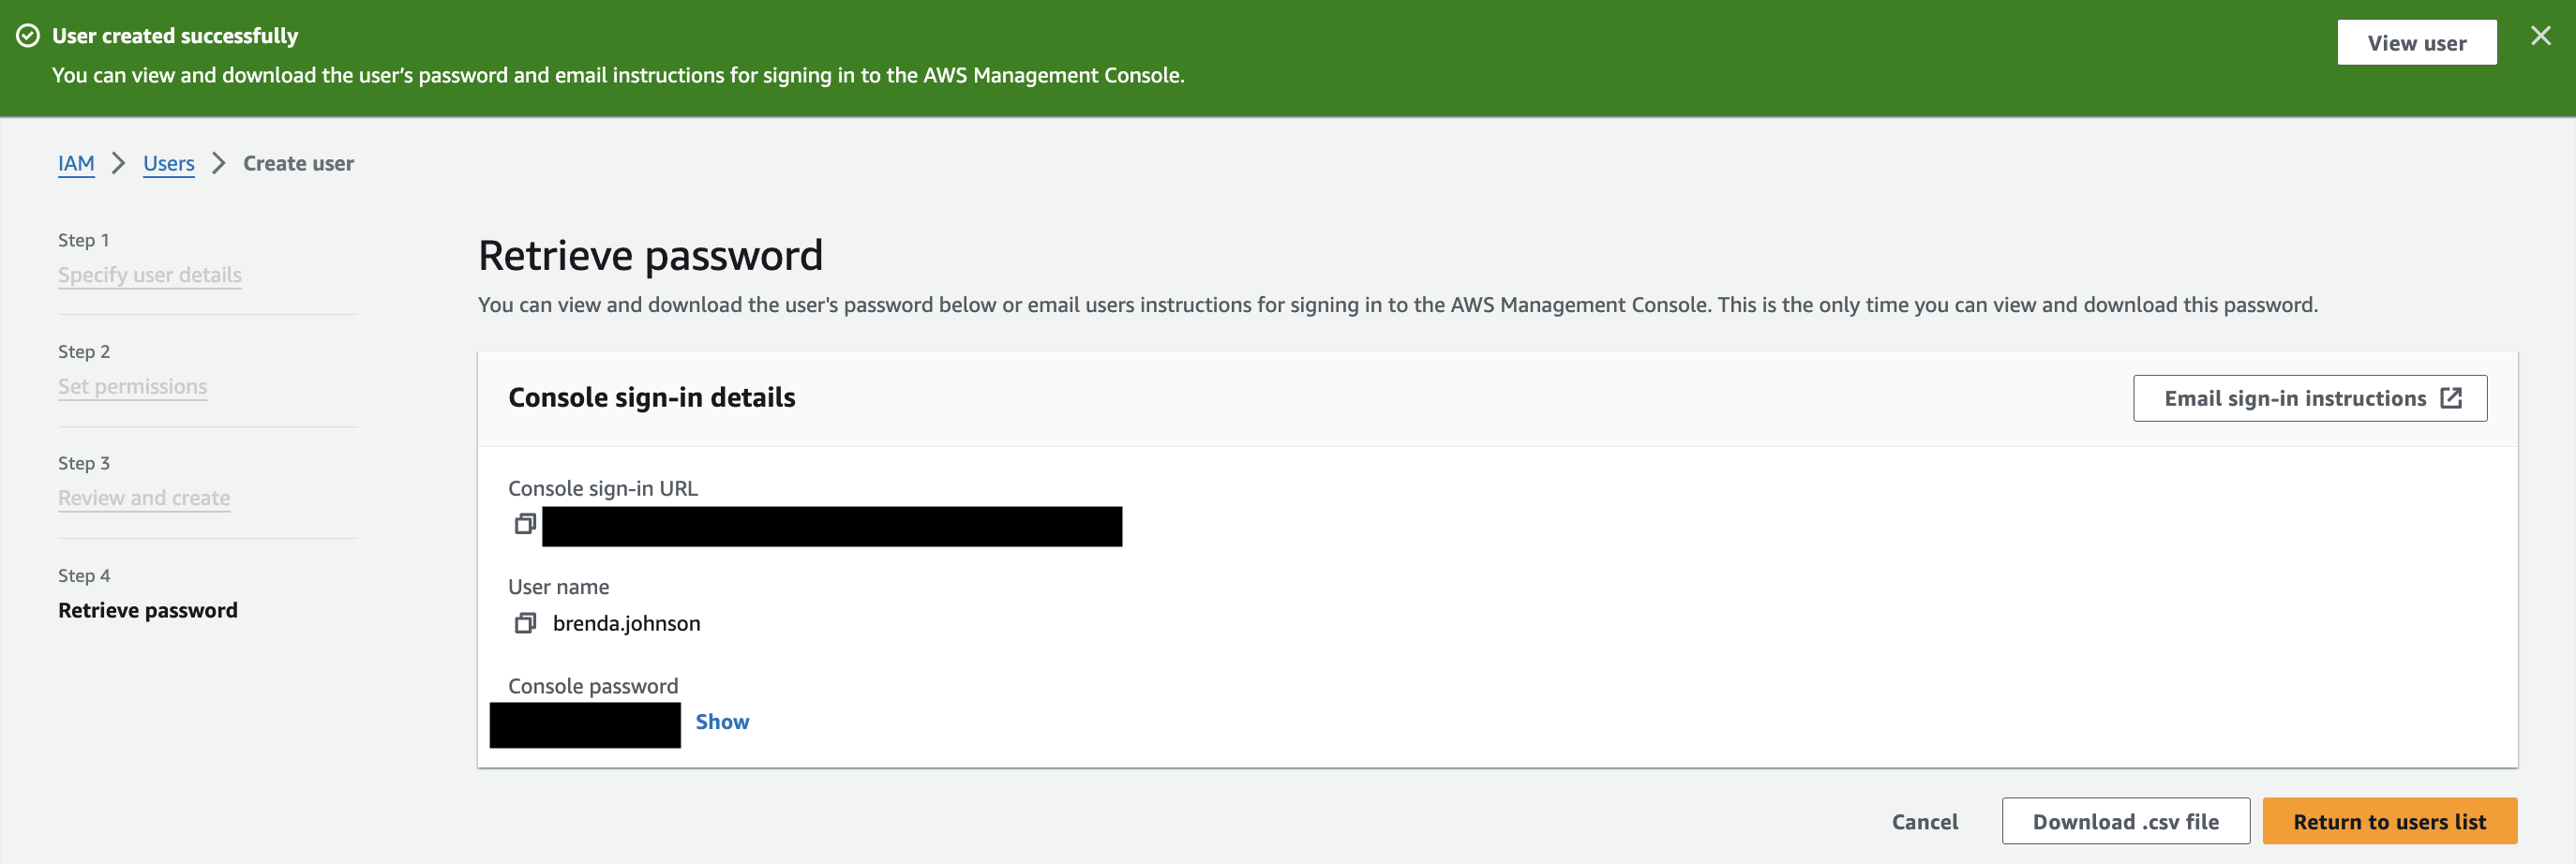
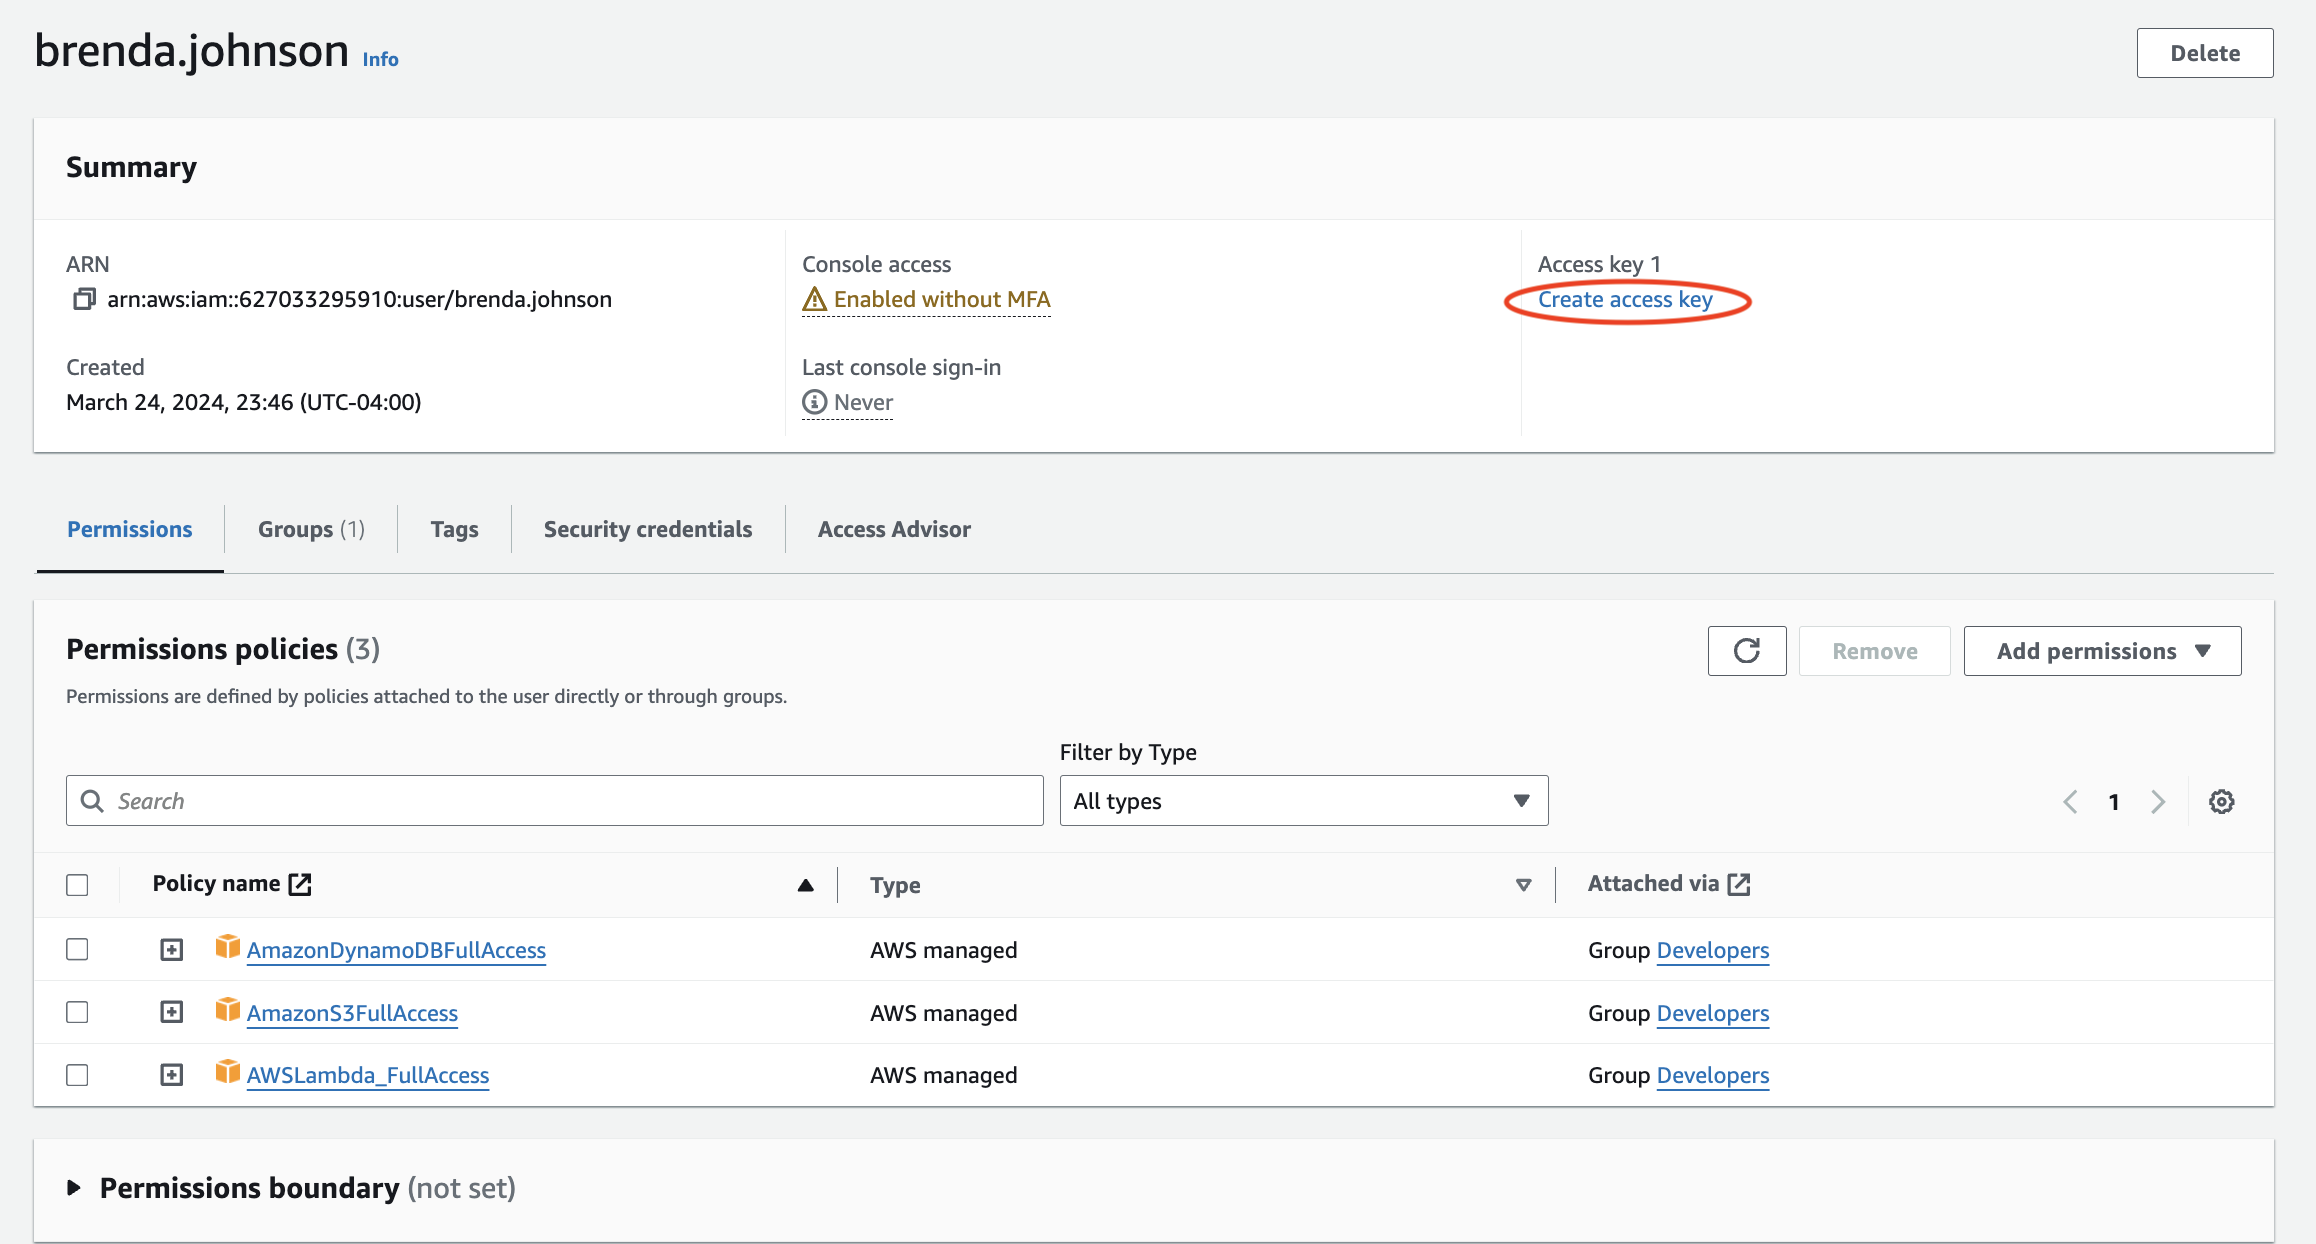
I returned to the users list and clicked on Brenda’s name which took me to her User page. As you can see, she is part of the Developers Group and has the permissions I mentioned before.
I went ahead and created an access key for Brenda so that she would be able to enable the AWS Command Line Interface(CLI) to access the AWS account.

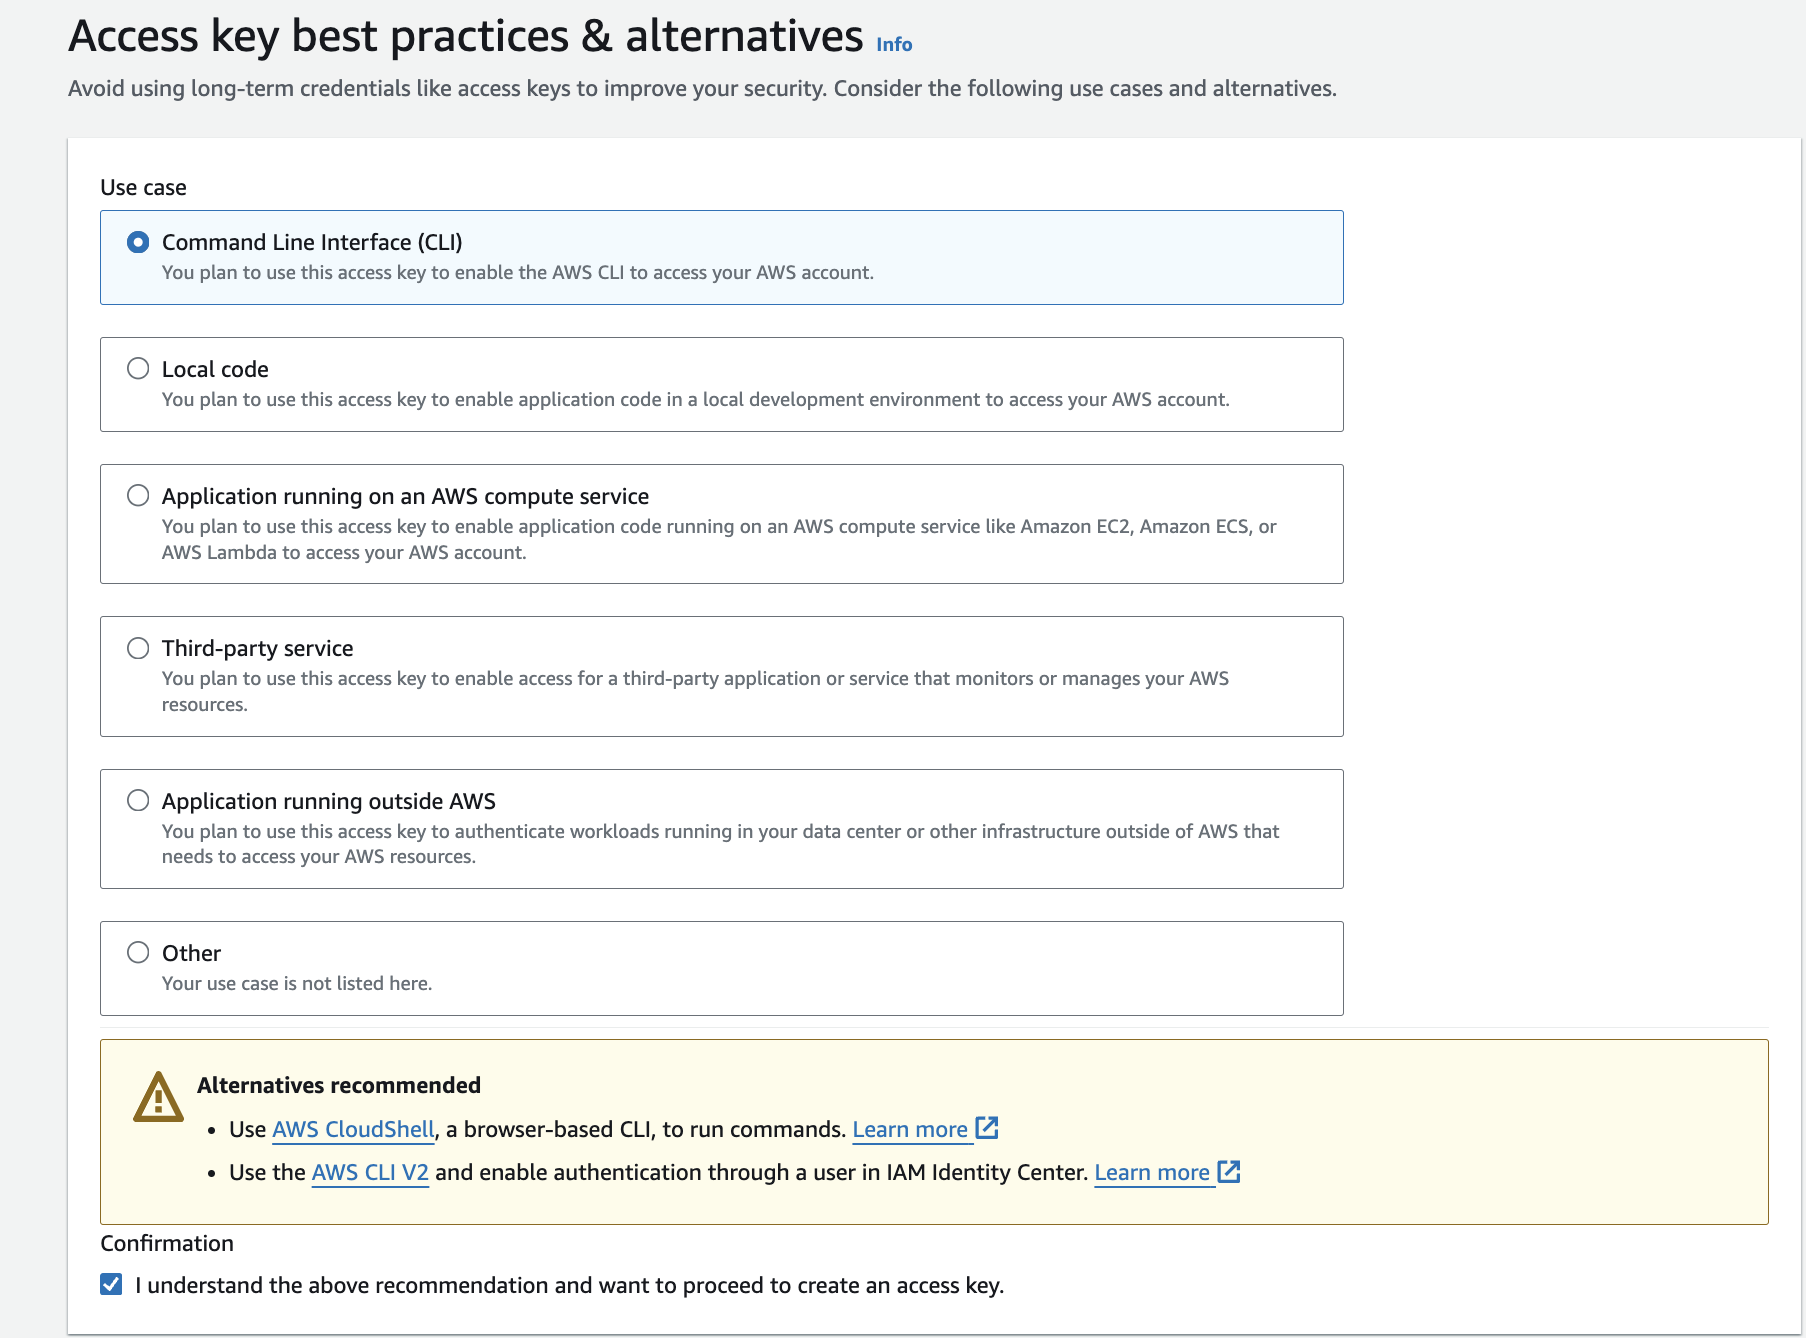
After creating Brenda’s access key, I repeated the same process to create another user, Stephanie Taylor, who is also a developer. I added Stephanie to the Developers group so she would get the same permissions as Brenda and created an access key so she too would be able to enable the AWS CLI.
The next two users I created, Bradley Smith and Sarah Brown, were testers so I put them in the Testers group. This group has S3 Full Access.
The last user I created was Brian Barnes, who was an administrator. I put him in the Admin group, giving him Administrator Access.
Here are all the users I created and you can see they each belong to a group.
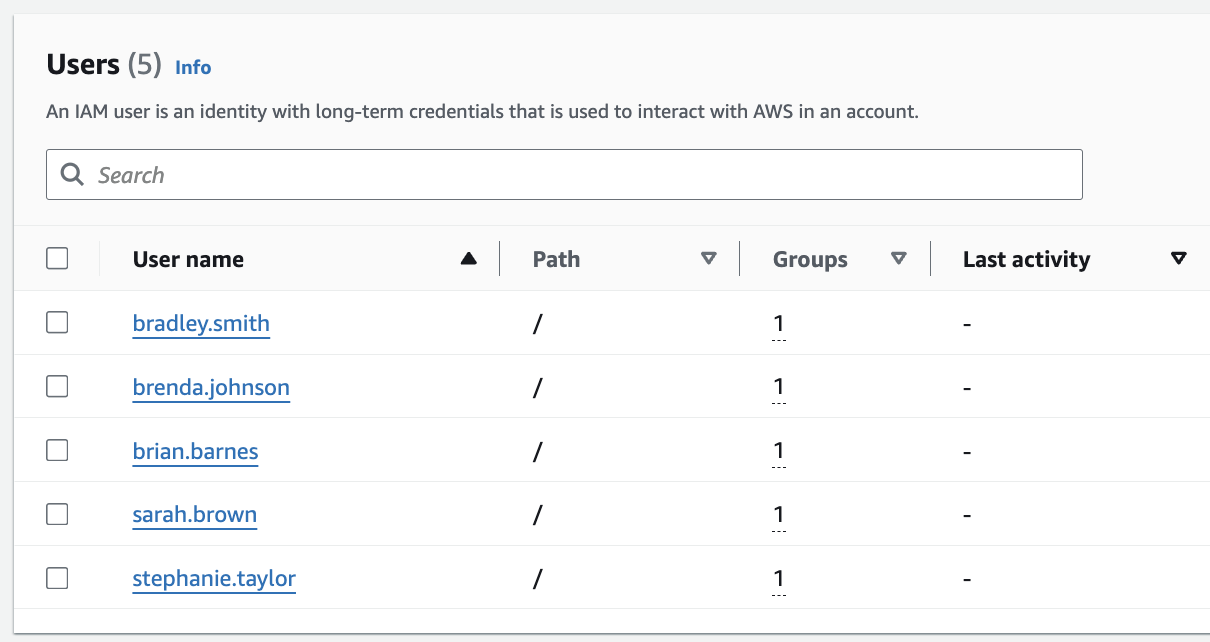
When I headed over to the “User groups” page, the groups I created were listed. The numbers listed in the “Users” column represent the number of users in the group. When I hovered over these numbers, it shows me the names of the people who are in the groups.
Brian Barnes - Admin
Brenda Johnson and Stephanie Taylor - Developers
Bradley Smith and Sarah Brown - Testers


When I clicked on the name of a group, for example, Testers, I am led to the testers page. This page provides a summary, lists the users in the group and its permissions policies.
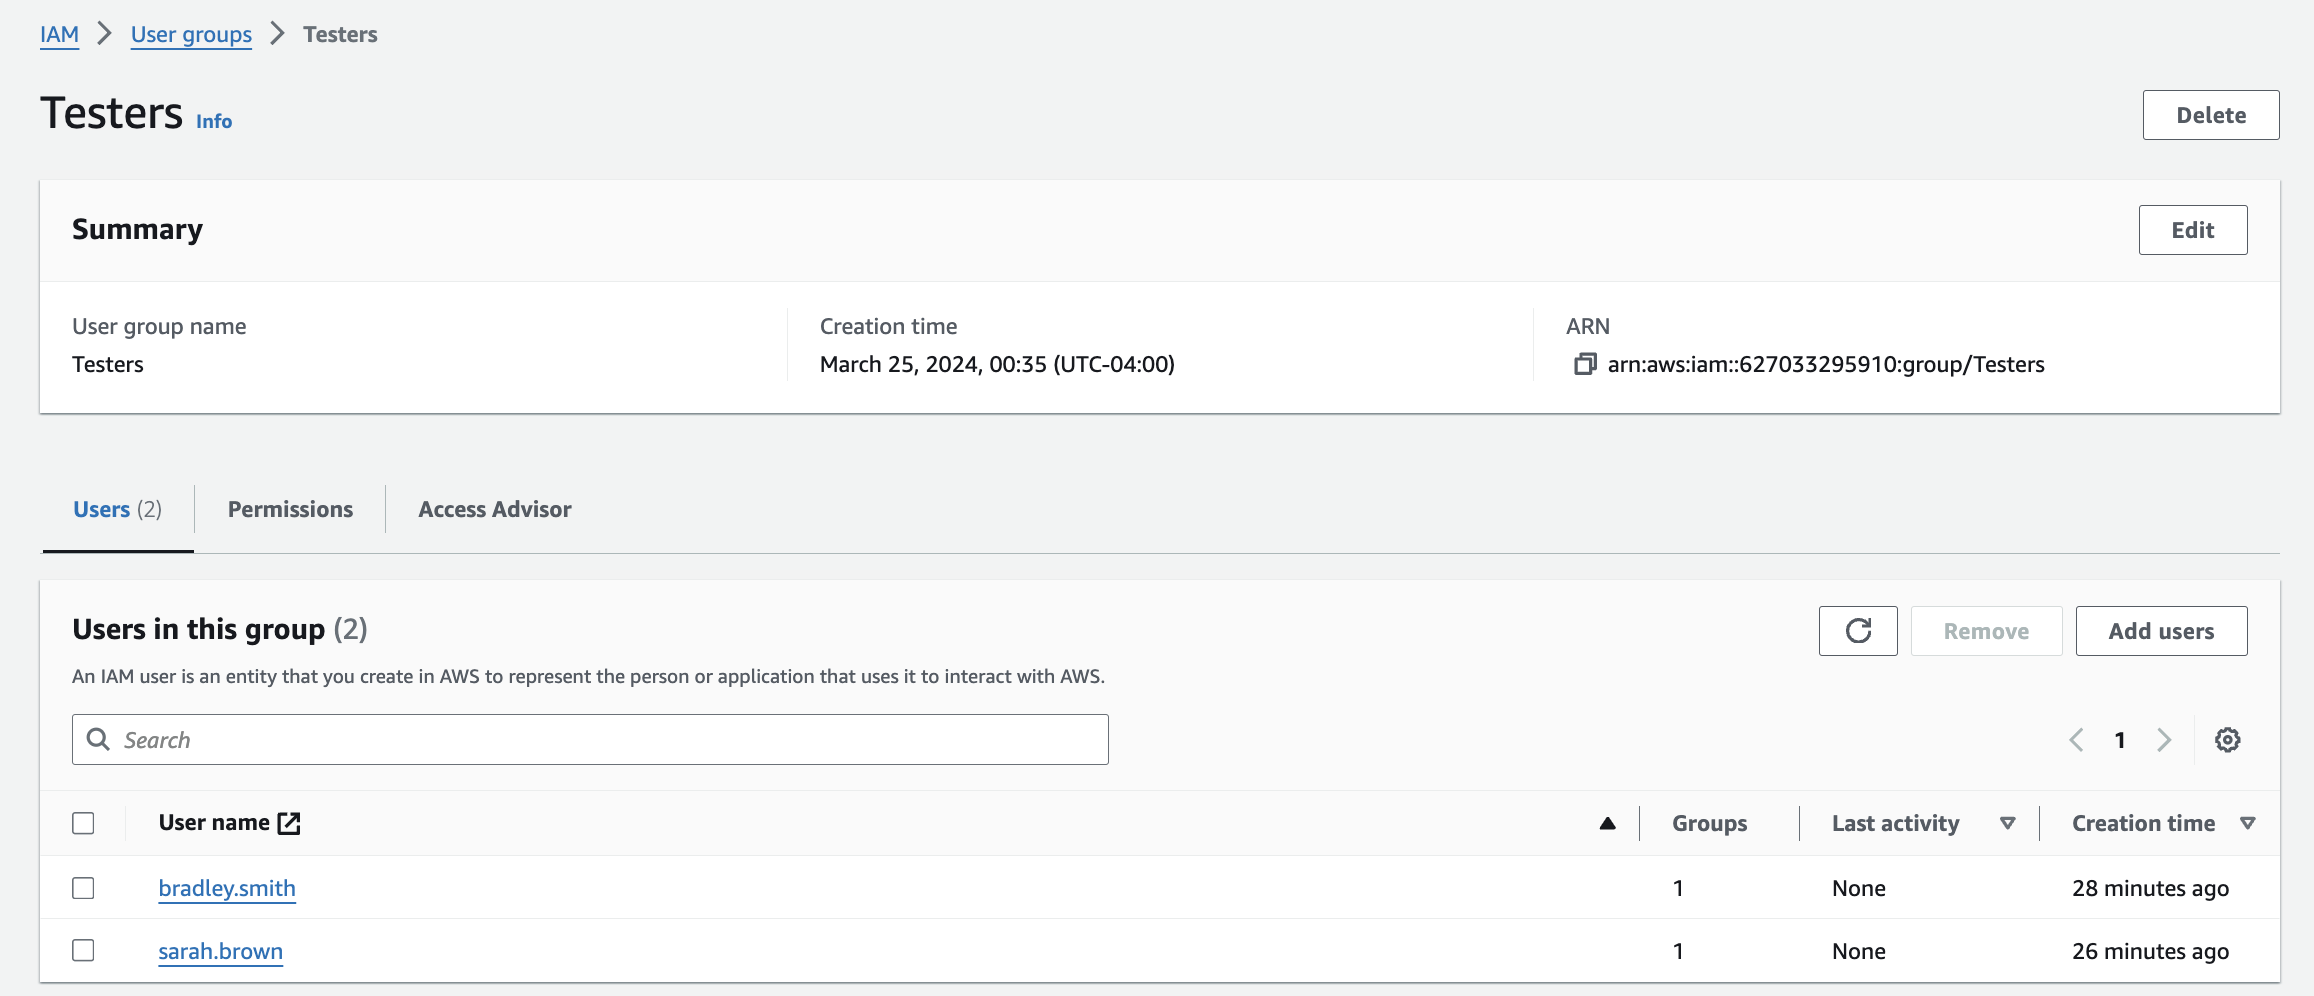
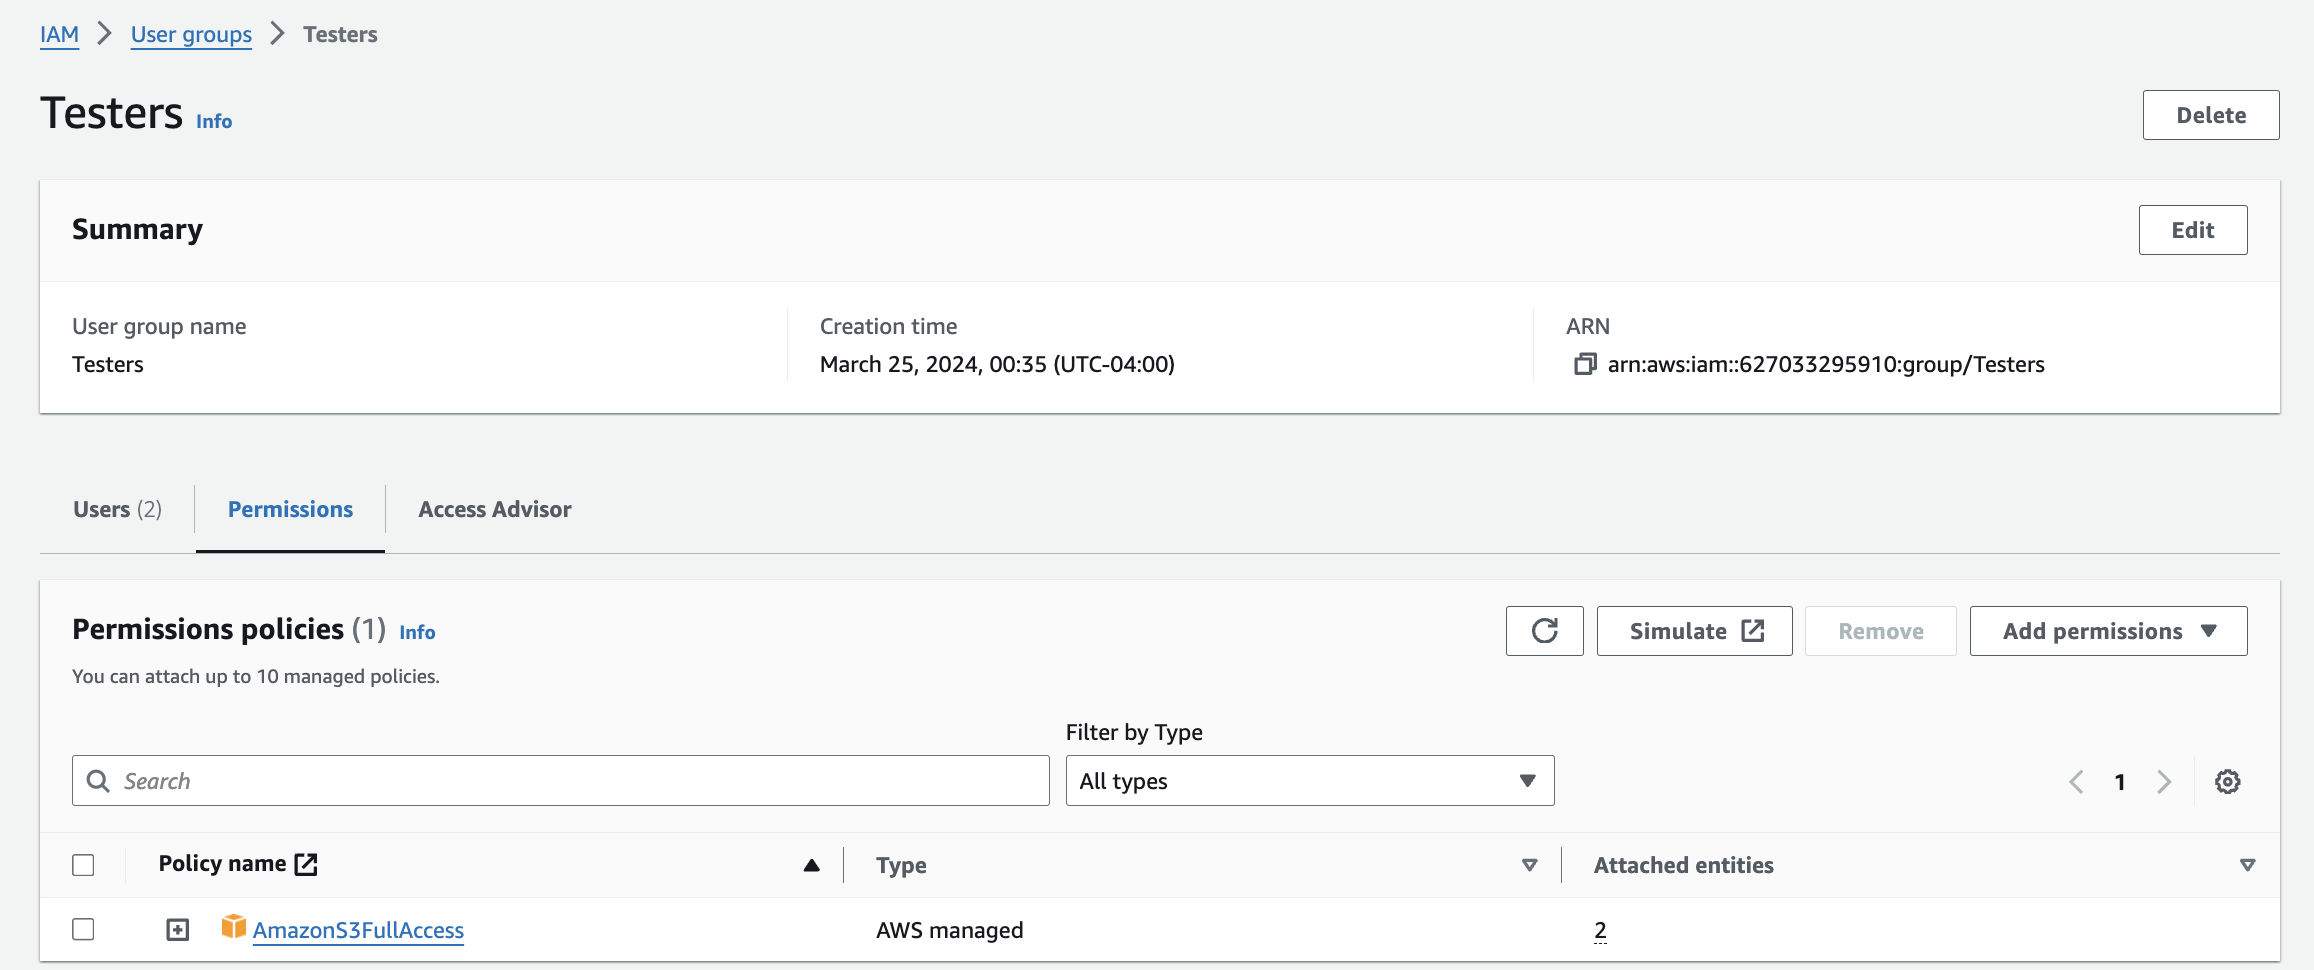
When I clicked into the policy, I could see the policy in JSON format.

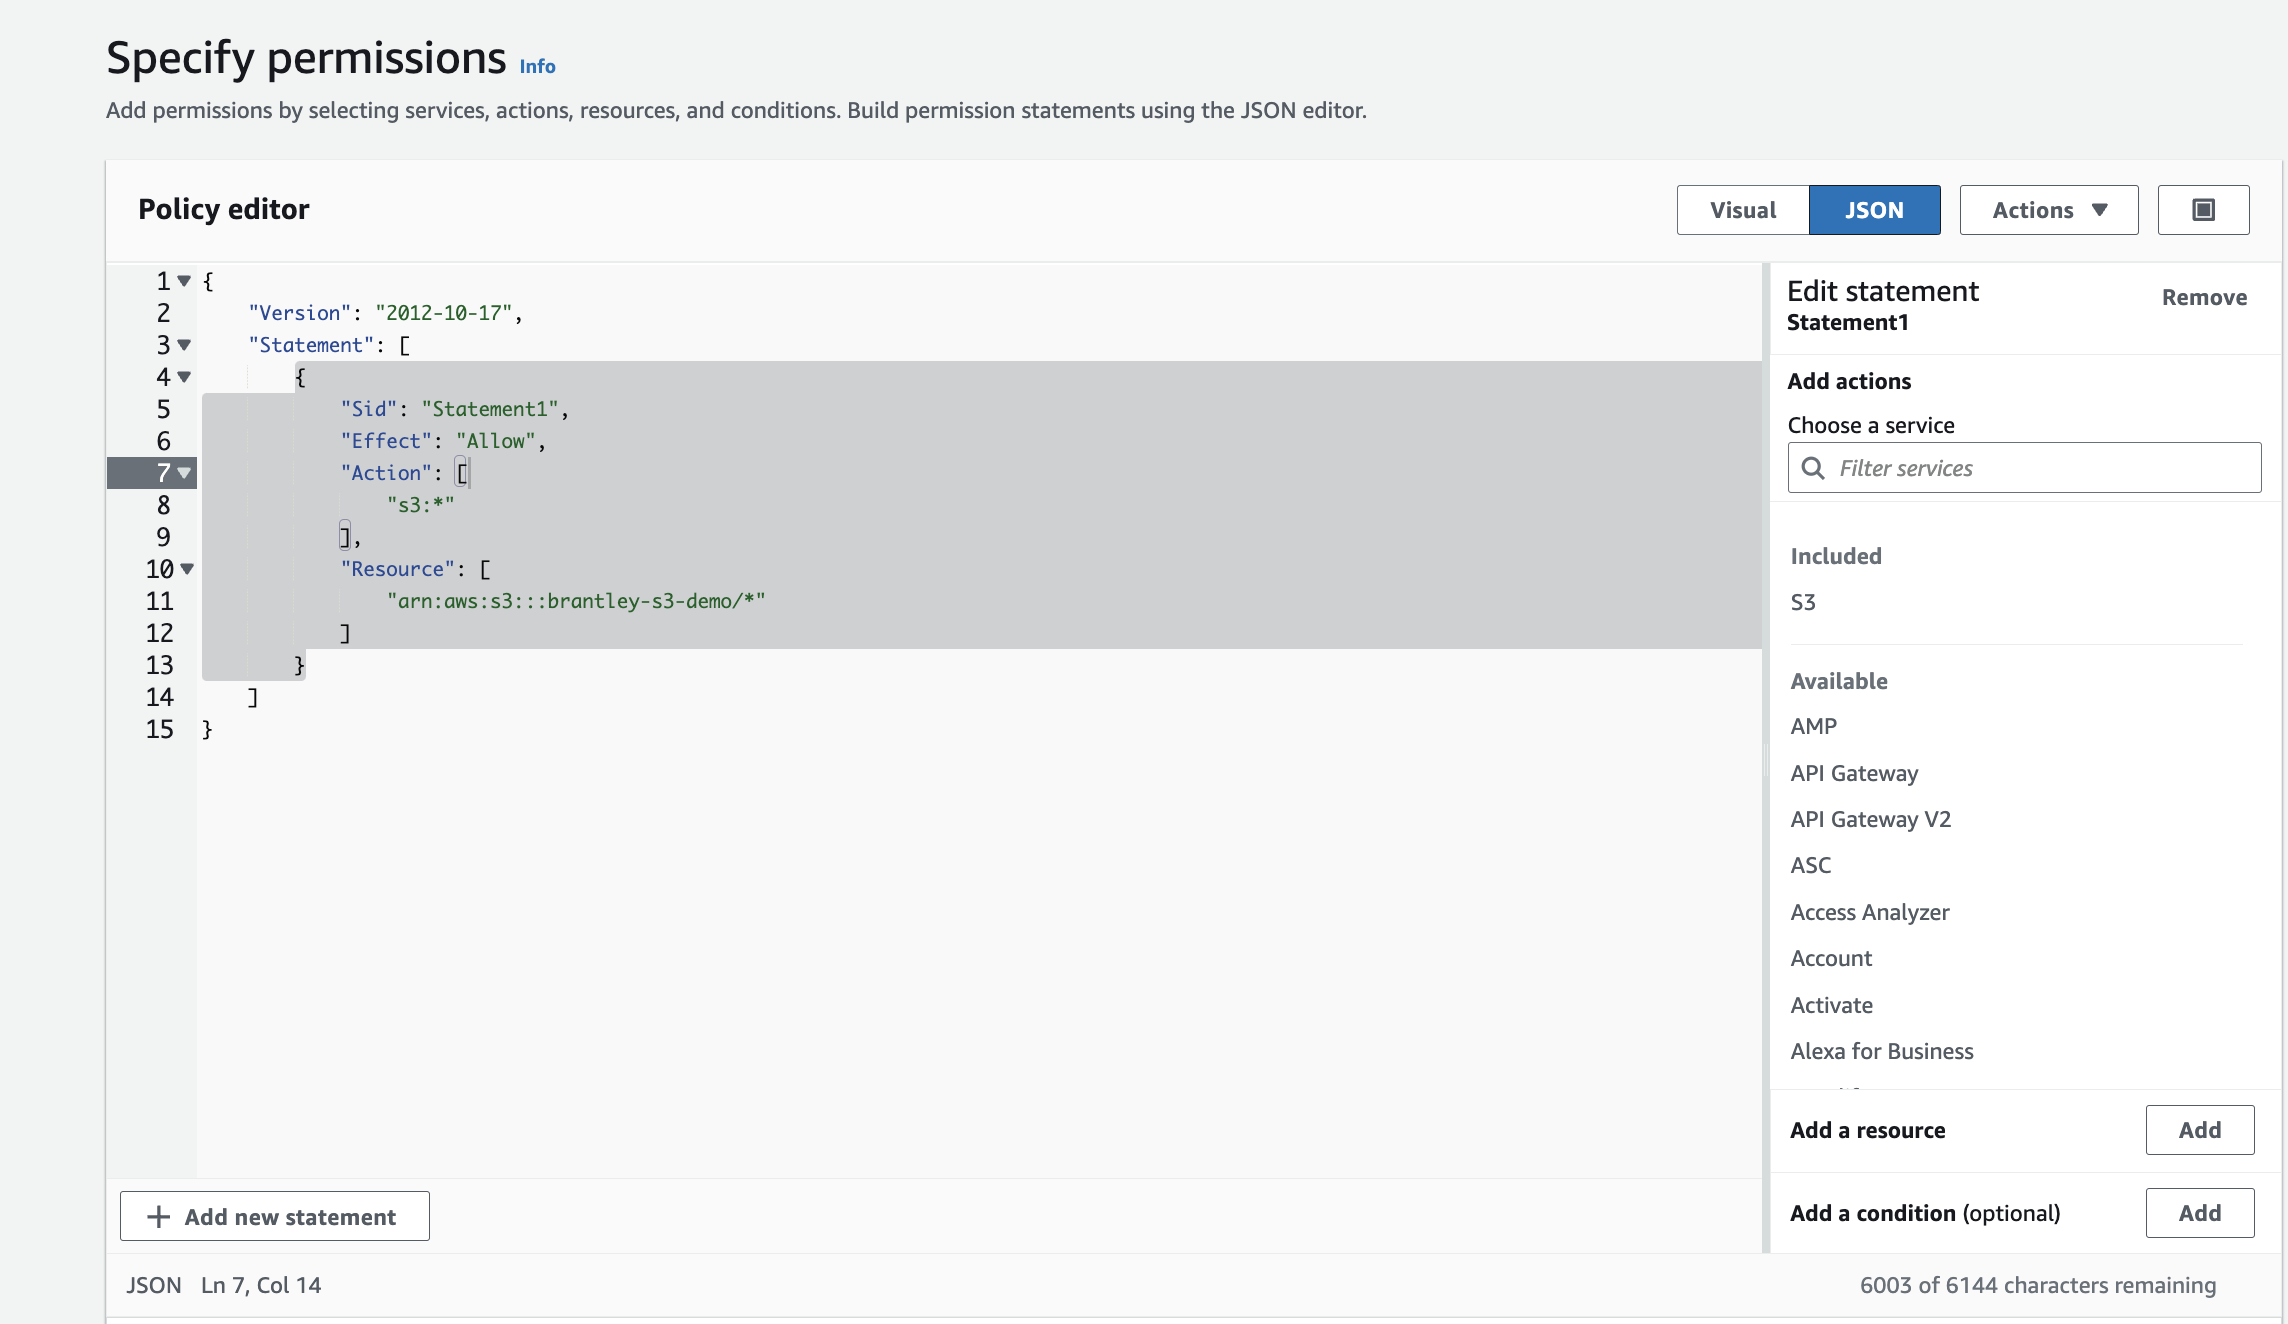
This leads me to my last point. As you saw above, I set the policies by simply checking off the policies I wanted for my group. Another way I could have created my policies would be to use the JSON format pictured below. I used the S3 documentation page for this example. This allows me to add the action(what action will take place) and the resource(where the action will take place).
This was process was pretty straight-forward for most part. I allowed my curiosity to take over and explored more of what IAM has to offer. I’m glad I was able to dive a bit deeper into this service and understand its importance.
With that, that’s a wrap for IAM! Next time, I’ll be exploring VPNs and VPCs.